whatsapp sharing button 8

BSES New Connection Apply: Types of Connection and More

In the heart of Delhi, a seamless solution awaits those seeking electrifying possibilities. With BSES New Connection Apply, the gateway to reliable power is effortlessly within reach. Serving distinct regions through BRPL and BYPL, BSES ensures uninterrupted electricity flow, from bustling commercial hubs to tranquil residential pockets. Tailored for diverse needs, the application process is simplified, allowing residents, associations, and businesses to effortlessly integrate with Delhi’s power grid. 
+

BSES Connection: Powering Delhi’s Homes

When it comes to a BSES connection in Delhi, you’re tapping into the reliable electricity supply provided by one of two subsidiaries:

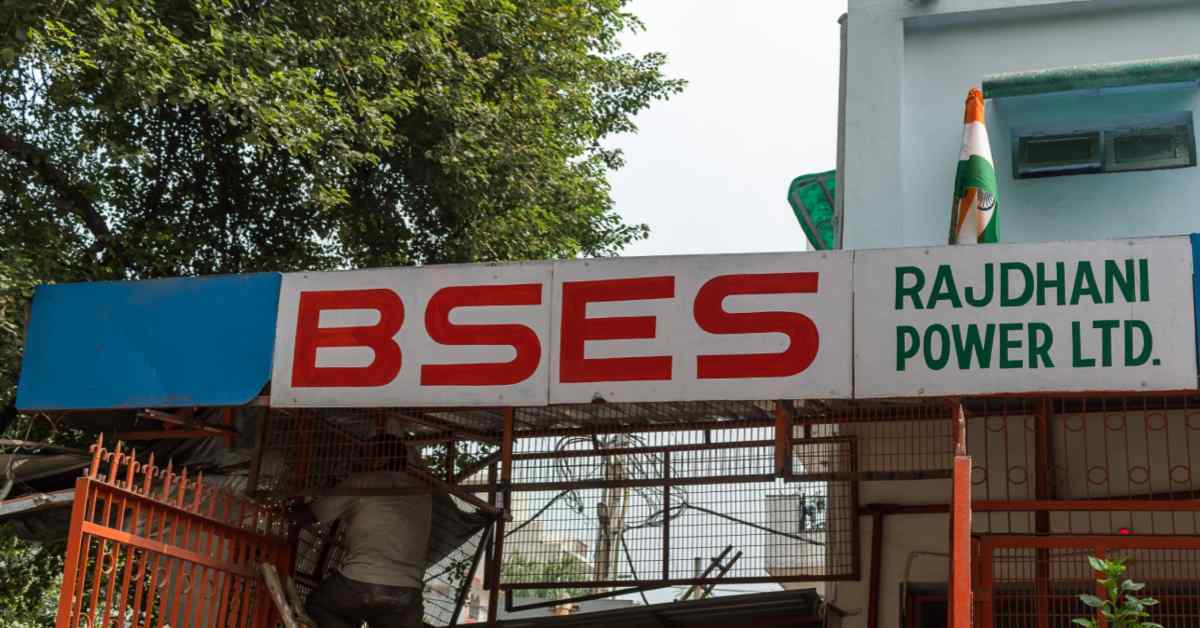
  • BSES Rajdhani Power Limited (BRPL): Serving South, West, and portions of Central Delhi.
  • BSES Yamuna Power Limited (BYPL): Energising North, East, and sections of Central Delhi.

These subsidiaries ensure that residents in their respective areas have access to a consistent and efficient source of electricity, keeping Delhi’s homes powered up.

Service Areas Covered by BSES Rajdhani Power Limited (BRPL)

BRPL plays a pivotal role in delivering dependable electricity across a vast area of nearly 700 square kilometres. This territory, which is characterised by a high customer density of about 3100 per square kilometre, spans 22 divisions in the southern and western parts of the region. BRPL efficiently caters to the energy needs of over 2.7 million customers in diverse localities, ranging from bustling commercial centres like Nehru Place and Janakpuri to residential havens such as Vasant Kunj and Alaknanda. This extensive coverage includes notable areas like Saket, Nizamuddin, and Dwarka, each with its unique demographic and power requirements.

The array of regions under BRPL’s service umbrella showcases its capability to manage a varied spectrum of electricity demands. From the historic charm of HauzKhas to the growing suburban landscapes of Uttam Nagar and Mohan Garden, BRPL ensures a consistent and reliable power supply. Its network extends to cover key areas like Punjabi Bagh, SaritaVihar, and Tagore Garden, highlighting its role in powering both residential communities and commercial establishments. This widespread presence underlines BRPL’s commitment to ensuring uninterrupted electricity to a dynamic mix of neighbourhoods, thereby playing a crucial role in the everyday lives of millions.

Service Areas Covered by BSES Yamuna Power Limited (BYPL)

BYPL, a pioneering force in power distribution reforms in Delhi, is renowned for delivering high-quality and dependable electricity services while prioritising customer satisfaction.

Established as a joint venture between Reliance Infrastructure Limited and the Government of NCT of Delhi, with a shareholding split of 51% to 49%, BYPL commenced operations on July 1, 2002. This marked a significant milestone following the unbundling of the former Delhi Vidyut Board (DVB). The scope of BYPL’s operations encompasses a license area spanning 200 square kilometres, encompassing the Eastern and Central regions of the National Capital.

To ensure an expansive reach and convenient service accessibility, BYPL serves its valued customers through three dedicated circles (South-East, North-East, and Central) and fourteen divisions (Chandni Chowk, Darya Ganj, Dilshad Garden, Jhilmil, Karawal Nagar, Krishna Nagar, Laxmi Nagar, Mayur Vihar Phases 1 & 2, Vasundhara Enclave, Nandnagri, Pahar Ganj, Patel Nagar, Shankar Road, and Yamuna Vihar). This strategic presence ensures that residents in these areas benefit from BYPL’s commitment to efficient and uninterrupted power supply.

Types of Connections Offered by BSES and Documents Required

When it comes to applying for a new electricity connection with BSES, it’s essential to understand the various types of connections they offer. Whether you’re a residential society, a commercial entity, or an individual, BSES has tailored solutions to meet your specific needs. Here’s an overview of the different connection types offered by BSES:

Connection for Common Services

1. RWA Society/Association (Common Services)

If you’re applying for a connection on behalf of a Resident Welfare Association (RWA) Society or Association for common services, here’s what you need:

  • A list of committee members.
  • An authority letter on RWA letterhead in favour of the signatory authority.

Please note that the DL-NH rate category will be issued only in this case.

Parking/Lift Connections/Staircase Lighting/Compound Lighting (Private/Unregistered Consumer)

For private or unregistered consumers requiring connections for parking, lift, staircase lighting, or compound lighting, you will need to provide the following documents:

  • Ownership proof of the applied address (any floor): Sale Deed, GPA, Partition Deed, Relinquishment or Release Deed, or Conveyance Deed.
  • Lift certificate issued by the Inspector of Lift, GNCT Delhi.

Additional information:

i) If you are one of the owners, you’ll need a No Objection Certificate (NOC) along with ID proof from other owners, along with a copy of the BRPL Bill.

ii) If you’re applying for an individual flat with a lift provision, you must provide an undertaking that the connection will not be used for lift purposes in the future.

iii) An undertaking is required if a lift is installed but not working.

iv) If the lift is installed and in working condition, a lift certificate will be required.

v) If the connection is for a common area with a lift provision, an undertaking is needed that the connection will not be used for lift purposes in the future.

Street Light Cases

For street light connections, you will need:

  • A government-issued cover letter specifying the purpose of the connection and the location address.

2. Outdoor Connections

Construction Projects (Private/Government)

If you are involved in construction projects, whether in the private or government sector, you will be required:

  • Ownership proof of the applied address: Tender Acceptance Letter, Offer Letter, or Letter of Commencement.
  • Memorandum of Association (MOA).
  • A resolution in favour of the signing authority is passed in compliance with the relevant laws.

Advertisement/Hoardings/Bus Shelters

For connections related to advertisements, hoardings, or bus shelters, you will need:

  • Ownership proof of the applied address: Allotment Letter, Offer Letter, or Letter of Commencement.
  • Memorandum of Association (MOA).
  • A resolution in favour of the signing authority passed in compliance with the relevant laws.

Connection for Weekly Markets

If you require a connection for a weekly market, it will be granted in the name of the association whose identification documents will be collected. You will need:

  • Ownership proof of the applied address: MCD Allotment Letter in the name of the association for the applied market.

Tehbazari/Khoka (Single Shop)

For Tehbazari or Khoka (single shop) connections, you must provide:

  • Ownership proof of the applied address: MCD Allotment Letter in the name of the applicant or Tehbazari receipt with the address.
  • NOC for Khokha or a temporary structure from the concerned MCD, DDA, or any other relevant land-owning agency.

EV Charging Point for Individual, E-rickshaw, or Commercial Purpose

If you are applying for an EV charging point for individual, e-rickshaw, or commercial use, you will need:

  • Ownership proof of the applied address, such as Sale Deed, GPA, Partition Deed, Relinquishment or Release Deed, Conveyance Deed, Khatoni, or a certificate issued by the SDM office, along with a lease agreement and the owner’s undertaking.
  • An indemnity bond.
  • A safety checklist.
  • Technical evaluation/test report for the charger.

In case you do not possess ownership documents, you will need an MCD Allotment Receipt or Challan of the same address in your name, along with a guarantor affidavit, CA number, copy of last month’s bill, and guarantor ID proof, all bearing the initials of both the guarantor and the applicant, along with the guarantor’s ownership proof for the supply address.

Please remember to maintain the supply address with the Pole Number and other landmarks, while the billing address should match the Guarantor CA number information.

Understanding BSES Tariff Structures For Different Types of Connection

The BSES tariff structures are categorised based on the type of connection and usage. Below is a detailed table outlining the fixed charges and energy charges for various categories:

CategoryFixed ChargesEnergy Charges
Domestic
Individual Connections (Upto 2 kW)20 Rs./kW/month3.00 Rs./kWh (0-200 units), 4.50 Rs./kWh (201-400 units), 6.50 Rs./kWh (401-800 units), 7.00 Rs./kWh (801-1200 units), 8.00 Rs./kWh (>1200 units)
Individual Connections (> 2kW to ≤ 5 kW)50 Rs./kW/monthAs above
Individual Connections (> 5kW to ≤ 15 kW)100 Rs./kW/monthAs above
Individual Connections (>15kW to ≤ 25 kW)200 Rs./kW/monthAs above
Individual Connections (> 25kW)250 Rs./kW/monthAs above
Single Point Delivery for GHS150 Rs./kW/month4.50 Rs./kWh
Non-Domestic
Upto 3kVA250 Rs./kVA/month6.00 Rs./kVAh
Above 3kVA250 Rs./kVA/month8.50 Rs./kVAh
Industrial250 Rs./kVA/month7.75 Rs./kVAh
Agriculture125 Rs./kW/month1.50 Rs./kWh
Mushroom Cultivation200 Rs./kW/month3.50 Rs./kWh
Public Utilities250 Rs./kVA/month6.25 Rs./kVAh
Delhi International Airport Ltd. (DIAL)250 Rs./kVA/month7.75 Rs./kVAh
Advertisement & Hoardings250 Rs./kVA/month8.50 Rs./kVAh
Temporary Supply
Domestic incl. Group Housing SocietiesAs per relevant categoryAs per relevant category without surcharge
For threshers (threshing season)Electricity Tax: Rs. 270/connection/monthFlat rate: Rs. 5,400/month
All other connections incl. construction projectsAs per relevant category1.30 times of the relevant category tariff
Charging Stations for E-Rickshaw/E-Vehicle
Supply at LT4.50 Rs./kWh
Supply at HT4.00 Rs./kVAh

Necessary Documents for a New BSES Connection

Applying for a new BSES connection is a straightforward process, but it requires certain essential documents to ensure a smooth and hassle-free experience. To help you navigate through the application process, here is a list of necessary documents you need to have in hand:

1. One Recent Passport Size Photograph

A recent passport-size photograph is required as part of your application. Make sure it meets the standard specifications.

2. Photo Identity Proof (Any One of the Following)

  • Valid Driving License
  • Electoral Photo ID Card
  • Aadhar Card
  • Photo Identity Card issued by any Government Authority
  • Valid Passport
  • PAN Card
  • Ration Card with Applicant’s Photo

3. If the Applicant is an Organisation (Including Company, Firm, LLP, etc.)
Read: Best Rent Payment Mobile App: List of Top 10 Apps in India to Pay Rent Online


Book Best Packers & Movers with Best Price, Free Cancellation, Dedicated Move Manager

Get Rental Agreement With Doorstep Delivery, Super Quick & Easy

This is third

This is third

This is fourth

This is fourth

This is fifth

This is fifth

This is six

This is six

This is seven

This is seven

This is eight

This is eight


  • Certificate of Incorporation/Registration issued by the Registrar
  • Proof of authorisation/resolution of the Board for authorising the person

Note: The authorised person applying for the connection on behalf of an organisation should also submit a recent passport size photograph along with any one of the identity proofs mentioned in point 2 (2a-2g).

4. Proof of Ownership or Occupancy of Premises (Any One of the Following) in Favour of Applicant

  • Certified Copy of Title Deed (Sale Deed)
  • Certified Copy of Conveyance Deed
  • General Power of Attorney (GPA)
  • Copy of Allotment Letter/Possession Letter
  • Mutation Certificate issued by a Government body (e.g., Local Revenue Authorities, Municipal Corporation, or land-owning agencies like DDA/L&DO)
  • Sub-division Agreement (along with ownership documents of premises) – In case of relinquishment deed/authorisation, an NOC issued by other co-owners is required
  • For bonafide consumers residing in specific areas, either a Ration Card or Electoral Identity Card with the same address can be accepted as proof of occupancy
  • Will + NOC from legal heirs along with ownership document of the will executioner (Note: A will is not valid if the executioner is alive)
  • Mutation Letter from DDA/Concerned MCD/Land & Development Officer
  • Copy of Gift Deed (along with title deed of the donor)
  • In case the applicant is a tenant: Valid lease agreement along with an undertaking that the lease agreement has been signed by the owner or their authorised representative. Alternatively, a rent receipt not older than three months along with an undertaking can be provided.
  • In the case of a temporary connection, additional documents are required.

5. Additional Documents for Temporary Connection (if applicable)

  • Applicant’s cancelled cheque
  • Guarantor’s undertaking, self-attested ID proof, and BRPL Bill (Note: Different requirements may apply for postpaid temporary connections)

Procedure to Apply for New BSES Connection

When it comes to applying for a new BSES connection, you have several options at your disposal. The choice of method largely depends on your comfort level with technology and personal preference. Below, we outline the various ways you can initiate the process, both online and offline:

1. Online Application

BSES Website: If you’re tech-savvy and prefer the convenience of the internet, the BSES Delhi website (www.bsesdelhi.com) is your go-to platform. 

  • Begin by clicking on the “New Connection” link. From there, select your area (BRPL or BYPL) and specify the category of connection you require, whether it’s domestic, commercial, or another type. 
  • Next, follow these steps: register or log in, complete the BSES new connection form online, upload the necessary documents, and submit your request.

BSES Mobile App: Another online option is to utilise the BSES Mobile App, available for download from the Google Play Store or Apple App Store. The process closely mirrors the website method. After installing the app, register as a user, fill out the application form, and submit your application conveniently from your mobile device.
Read: Make Gail Gas Bill Payment:  A Complete Guide

2. Offline Application:

BSES Call Center: If you prefer a more personal touch, you can reach out to the BSES Call Center at 011-39999808. When you make the call, a friendly customer service representative will assist you in applying for your new connection. They’ll guide you through the process and address any inquiries you may have, ensuring a smooth experience.

BSES Division Office: For those who prefer face-to-face interactions, consider visiting the nearest BSES division office in your locality to submit your application in person. You can easily find the details of the divisional office closest to you on the BSES website or by contacting the call centre.

Application Fees for New BSES Connection and Payment Options

When applying for a new BSES connection, it’s essential to understand the associated application fees and the various payment options available. Let’s delve into the details:

  1. Application Fees: Application fees are essential to cover administrative costs and processing expenses incurred during the connection setup. The exact amount of these fees may vary, and you can find the specific details on the BSES website.
  2. Security Deposit: A refundable security deposit is a standard requirement for new connections and is determined based on the sanctioned load and connection type. During the application process, you will be provided with the exact deposit amount based on your specific situation.
  3. Metre Charge: In addition to the application and security deposit fees, there is a one-time meter charge. This fee covers the installation and maintenance of the meter. The precise amount of the meter charge depends on the type of meter chosen for your connection.
  4. Service Line Charges: Service line charges encompass the cost associated with laying cables from the nearest distribution box to your premises. These charges are part of the overall expenses you’ll need to consider when applying for a new connection.
  5. Processing Fee: A processing fee is applicable for handling the administrative aspects of your new connection application. This fee ensures that your application is processed efficiently and in a timely manner.
  6. Payment Options: BSES offers a range of convenient payment options to suit your preferences:
  • Online Payments: You can make payments online through the official BSES website or the BSES Mobile App. This method allows for a hassle-free and secure transaction experience.
  • Bill Payment Centres: Designated bill payment centres are available for in-person payments. You can visit these centres to make your payments conveniently.
  • Authorised Banks: Payments can also be made through authorised banks, providing you with additional flexibility in settling your fees.
  • Cash/Cheque Payments: If you prefer to pay in cash or by cheque, you can visit BSES O&M (Operation & Maintenance) offices to make your payment.

By offering multiple payment options, BSES aims to make the payment process as convenient as possible for applicants. Whether you choose to pay online, visit a payment centre, or opt for a bank transaction, BSES ensures a smooth and accessible payment experience to facilitate your new connection application.

For more details click  

BSES Online New Connection: Inspection and Approval Process

Applying for a new BSES connection involves a crucial inspection and approval stage. Navigating this process effectively is essential for a seamless connection experience.

1. Application Verification: 

  • The process begins with BSES thoroughly verifying your application to ensure that all required documents are in order.

2. Site Inspection: 

  • A BSES official will conduct a site inspection at your property to assess the feasibility of the connection.
  • During this inspection, they will examine the property’s location, determine the proposed site for the meter box, and identify the service line entry point.
  • The team may also measure distances, assess potential cable routes, and determine the required cable size.

3. Estimation of Costs:

  • Based on the findings of the site inspection, BSES will provide you with an estimate of the total costs involved in setting up the new connection.
  • These costs may include the security deposit, meter charge, service line charges, and any other applicable fees.

4. Confirmation Letter:

  • If your application is approved following the inspection, you will receive a confirmation letter from BSES.
  • This letter will detail the estimated costs, connection specifics, and the anticipated timeline for installation.

5. Payment of Fees:

  • Upon receipt of the confirmation letter, it’s time to make the required payments. This includes the security deposit, meter charge, service line charges, and any processing fees.
  • Be sure to retain all payment receipts for future reference.

6. Coordination for Installation:

  • After processing your payments, coordinate with BSES to schedule the installation.
  • BSES will send a team of skilled technicians to your location to handle the installation process.

7. Final Checks:

  • During installation, the BSES technicians will conduct final checks to ensure proper connections, grounding, and adherence to safety standards.

8. Connection Activation:

  • Upon successful installation and checks, BSES will activate your new connection.
  • You will be provided with the initial meter reading and a consumer number for future billing purposes.

9. Post-Installation Responsibilities:

  • After the connection is activated, it’s your responsibility to arrange for internal wiring within your premises.
  • Hiring a licensed electrician is recommended, and make sure to obtain all necessary electrical safety certificates from them for verification.

10. Stay Informed:

  • Stay updated on the latest BSES policies and procedures by regularly checking the official website or contacting customer support for any updates.

Key Reminders:

  • Be present during the site inspection to address any queries or concerns.
  • Prioritise safety measures during the installation process to ensure a secure and reliable connection.
  • Keep all essential documents, including confirmation letters and payment receipts, safely stored for future reference.
  • By following these steps and staying informed, you’ll navigate the BSES inspection and approval process smoothly, ensuring a hassle-free experience as you embark on your journey with your new BSES connection.

Detailed Process of BSES Meter Installation

You’re on the brink of electrifying your space with a new BSES connection! Let’s dive into the comprehensive process of meter installation:

Pre-Installation Preparations: 

  • You’ve completed the application process, settled the required fees (security deposit, meter charge, service line charges, and processing fee), and received the confirmation letter from BSES.

Installation Day: 

  • A team of skilled BSES technicians will arrive promptly at your property on the scheduled day, equipped with the necessary tools and materials.

Meter Box Installation:

  • The technicians will meticulously identify the designated location for the meter box, typically situated outside your property near the main power line entry point.
  • Using specialised drills and equipment, they will securely affix the meter box onto the wall or the designated surface.

Service Line Laying:

  • The team will undertake the task of trenching or laying the service line cable from the nearest distribution box to your property.
  • This process may involve digging, the installation of protective conduit pipes, and ensuring the proper routing of cables.

Safety First:

  • Throughout the entire installation process, the technicians will prioritise safety measures. They will don protective gear, employ insulated tools, and maintain safe distances from live wires, ensuring a secure working environment.

Connection and Meter Activation:

  • Once the meter box and service line are successfully installed, the technicians will conduct final checks to ensure impeccable connections, grounding, and compliance with safety standards.
  • Following these rigorous checks, they will activate the connection, ushering electricity into your property.
  • You will be provided with the initial meter reading and a consumer number for future reference and convenient bill payments.

Post-Installation Responsibilities:

  • Internal Wiring: It’s essential to remember that internal wiring within your premises falls under your responsibility. Engage a licensed electrician to expertly connect the main supply to your internal electrical system.
  • Safety Certificates: Obtain all the necessary electrical safety certificates from your electrician. These certificates not only ensure safety but also serve as verification and peace of mind.
  • Maintain a record of all payment receipts and connection documents for future reference.

Activating Your New BSES Connection

As you approach the activation of your fresh BSES connection, here’s a concise guide to walk you through the process.

  • Final Checks: BSES technicians meticulously inspect all components to ensure they are properly installed and meet stringent safety standards.
  • Meter Reading and Consumer Number: As part of the activation process, you will receive the initial meter reading, providing the starting point for your energy consumption tracking. You’ll also be assigned a consumer number, essential for billing and communication purposes.
  • Connection Activation: BSES takes the necessary steps to activate your connection, seamlessly integrating it into the power grid.
  • Testing the Connection: Rigorous testing procedures are conducted by BSES to ensure the stability and reliability of your newly established connection.
  • Notification: You’ll receive a confirmation notification from BSES via email, SMS, or a physical letter, assuring you that your connection is up and running smoothly.
  • Billing Cycle Start: Your monthly billing cycle is set to commence around the 25th of each month, allowing you to keep track of your electricity consumption.
  • Internal Wiring: It’s crucial to entrust the task of internal wiring to a licensed electrician. They will ensure that the connection from the main supply to your internal electrical system is handled with expertise and adherence to safety standards.
  • Post-Activation Tips: After activation, it’s advisable to monitor your usage closely to manage your energy efficiently. Keep your connection details easily accessible for reference, and stay informed about any updates or changes in BSES policies and procedures.

How to Make Monthly BSES Bill Payments?

Payment via BRPL Power App/ BYPL Connect 

  1. Download and install the BRPL Power App/ BYPL Connect on Android or iOS.
  2. Register or log in using your consumer number or phone number.
  3. View your current bill details and choose the payment method (debit/credit card, net banking, UPI platforms).
  4. Enter payment details and confirm the transaction.
  5. Receive a confirmation receipt within the app and via email or SMS.

NoBroker Pay

  1. Access the “Payments” section on the NoBroker platform.
  2. Select “Utilities” and then “BSES bill.”
  3. Enter your consumer or account number.
  4. Verify bill details and amount.
  5. Choose your preferred payment method (wallet, debit/credit card, UPI).
  6. Complete the payment.
  7. Receive a confirmation receipt within the platform and via email or SMS.

BSES Website:

  1. Visit the official website of BSES Rajdhani Power Limited.
  2. Enter your account number and click on Quick Pay.
  3. View your bill details and select your preferred payment method (debit/credit card, net banking, payment gateways).
  4. Enter payment details and confirm the transaction.
  5. Receive a confirmation receipt via email or SMS.

UPI Apps (Paytm, Google Pay, PhonePe, etc.)

  1. Open your preferred UPI app.
  2. Select “Bill Payments” and choose “Electricity.”
  3. Find “BSES Bill Payment”
  4. Enter your consumer or account number.
  5. Verify bill details and amount.
  6. Confirm payment using your UPI PIN.
  7. Receive a confirmation receipt within the app and via email or SMS.

Offline Payment at Designated Centres

  1. Find the nearest authorised bill payment centre on the BSES website or app.
  2. Visit the centre with your bill copy and cash or cheque.
  3. Present your bill and make the payment.
  4. Receive a receipt for your payment.

Payment at Authorised Banks

  1. Check with your bank for BSES bill payment availability and instructions.
  2. Provide your consumer or account number for accurate processing.
  3. Make the payment over the counter or through online banking.
  4. Receive a confirmation message or slip from the bank.

Cash/Cheque Payment at O&M Offices

  1. Find the nearest BSES O&M office on the website or app.
  2. Visit the office with your bill copy, cash, or cheque.
  3. Present your bill and make the payment.
  4. Receive a receipt for your payment.

BSES Contact and Support Details

  • BRPL: For assistance with your queries or complaints, please email customer care at brpl.feedback@relianceada.com or call 011 39999707 / 19123 (Toll-free).
  • BYPL: Contact BYPL at 011-39999808 or visit the nearest Division Customer Care Centre. You can also access support online through the website www.bsesdelhi.com or download the MobileApp.
  • If you want to leave any feedback related the services. You can write here.

Take the leap to a brighter tomorrow by initiating your journey with a seamless and efficient BSES new connection apply. As you embark on this electrifying venture, consider elevating your experience with NoBroker Pay. This smart payment platform not only simplifies BSES bill payments but also offers exclusive discounts and rewards on various utility payments. 

Unleash the power of convenience and savings by making NoBroker Pay your go-to platform for managing your BSES and other utility expenses. Illuminate your life effortlessly with BSES, and amplify your savings with NoBroker Pay. For a future where convenience meets affordability, switch to NoBroker Pay today!

FAQ’s

How can I check my BSES Rajdhani application status?

BSES new connection status check can be done by simply visit the official BSES website, go to the “New Connection” section, and use your application reference number to track the progress of your request.

What are the BSES new meter connection charges?

The BSES new meter connection charges may vary based on factors like meter type and sanctioned load. It’s advisable to check with BSES for the most accurate and up-to-date information regarding these charges.

Can I apply for a BSES Yamuna new connection online?

Yes, absolutely! BSES Yamuna new connection apply online can be easily done through their official website, making the process quick and convenient.

What are the BSES rules for a new connection?

BSES follows specific rules and guidelines for new connections, including document requirements, application procedures, and safety standards. It’s essential to adhere to these rules to ensure a smooth and compliant connection process.

How can I initiate the BSES Rajdhani meter apply process online?

To apply for a BSES Rajdhani meter online, visit the official BSES website or their mobile app, where you’ll find the necessary forms and instructions to get started with ease.

Contact Us


Subscribe

Priyanka Saha

Hailing from Kolkata, Priyanka, a lover of literary classics, finds immense joy in exploring the nuances of language. With an unwavering love for reading stories and a profound passion for storytelling and wordplay, she effectively communicates relevant and practical information about the Indian realty market in a distinctive manner. Through her blogs, she skillfully immerses readers into the world of real estate, guiding them through every nook and cranny of the industry.

NPCL New Connection: Types of Connection, Procedure, Application Fee & More

NPCL New Connection: Types of Connection, Procedure, Application Fee & More

Light up your surroundings with the brilliance of Noida Power Company Limited’s (NPCL) cutting-edge solutions. Delve into the seamless process of acquiring an NPCL new connection, a beacon of power that transforms living and working spaces. NPCL stands tall as the pioneer in powering Greater Noida and its expansive areas, extending its services to meet the diverse electricity needs of over 700,000 residents. From residential to commercial, NPCL caters to every requirement, ensuring a tailored approach to your unique needs. 

Join us on this journey as we explore the efficiency, simplicity, and innovation that define the process of securing a new connection with NPCL.

Coverage Areas of NPCL: Illuminating Greater Noida and Beyond

Noida Power Company Limited (NPCL) plays a pivotal role in the distribution of power in Greater Noida, a burgeoning industrial hub near Delhi, in Uttar Pradesh. This dynamic company is dedicated to lighting up urban settlements, villages, and hamlets, covering a vast expanse of approximately 335 sq. km. Let’s delve into the specifics of NPCL’s service areas and its noteworthy journey.

Service Coverage

NPCL’s primary focus is on Greater Noida, where it extends its services to cater to the diverse needs of a population exceeding 700,000 residents. These residents reside in hamlets, villages, and a newly developed township, showcasing the company’s commitment to providing power across various demographics and geographies.

Ownership and Collaboration

Established as a joint venture between the RP-Sanjiv Goenka Group and the Greater Noida Industrial Development Authority (GNIDA), NPCL embodies a harmonious partnership between a leading Indian business house and an autonomous body responsible for town planning and infrastructure development. This collaboration reflects the strategic entry of the RP-Sanjiv Goenka Group into the privatised distribution of electricity in North India.

Inception and Licensing

NPCL commenced its operations in December 1993, following the grant of a license by the Uttar Pradesh Government. This marked a significant milestone in the company’s history, as it embarked on a journey to revolutionise the distribution of electricity in the region.

Types of Connections Offered by NPCL

NPCL provides a range of connection options to meet diverse electricity needs. Each connection type is tailored to specific purposes, ensuring that customers get the right solution for their requirements.

Domestic Connections

  • Purpose: Designed for residential households.
  • Features: Powers lights, fans, appliances, and household equipment.

Non-Domestic Connections

  • Purpose: Caters to commercial, industrial, and institutional establishments.
  • Includes: Shops, restaurants, offices, factories, schools, hospitals.

Temporary Connections

  • Purpose: Provided for short-term needs.
  • Examples: Construction sites, events, and temporary establishments.

Single Point Connections

  • Purpose: Common in housing societies or apartment complexes.
  • Features: A single meter measures collective electricity consumption.

Multipoint Connections

  • Purpose: Popular in high-rise buildings.
  • Features: Individual meters for each unit, enabling residents to pay for their own usage.

Choosing the right connection type depends on the nature of your premises and electricity needs. NPCL provides guidance to help you select the most suitable option. Whether it’s illuminating your home, powering your business, or meeting temporary requirements, NPCL ensures that you have the right connection for your unique needs.

Understanding NPCL Tariff Structures For Different Types of Connection

In NPCL’s tariff structures consumers are categorised based on the type of connection they receive. Let’s delve into the details and unravel the intricacies of the Rural Schedule and Single Point bulk loads.

Rural Schedule Connections

Lifeline Consumers:

For those with a contracted load up to 1 kW and an energy consumption of up to 100 kWh per month, NPCL introduces a special tariff structure.

DescriptionFixed Charge (Rs. / kW / month)Energy Charge (Rs. / kWh)
Load up to 1 kW and consumption up to 100 kWh/moRs. 50.00Rs. 3.00

Other Consumers:

This category encompasses consumers who don’t meet the criteria for Lifeline consumers.

  • Un-Metered Consumers:
DescriptionFixed Charge (Rs. / kW / month)Energy Charge (Rs. / kWh)
Un-MeteredRs. 500.00
  • Metered Consumers:
Consumption RangeFixed Charge (Rs. / kW / month)Energy Charge (Rs. / kWh)
Up to 100 kWh / monthRs. 90.00Rs. 3.35
101 – 150 kWh / monthRs. 3.85
151 – 300 kWh / monthRs. 5.00
Above 300 kWh / monthRs. 5.50

Single Point Bulk Loads (50 kW and above)

For townships, registered societies, residential colonies, and multi-storied residential complexes, as well as Military Engineer Service (MES) for Defence Establishments, the tariff structure is as follows:

DescriptionFixed Charge (Rs. / kW / month)Energy Charge (Rs. / kWh)
For loads 50 kW and above, with 70% exclusively for domestic purposes (Mixed load)Rs. 110.00Rs. 7.00

Necessary Documents for a New NPCL Connection

If you’re considering a new NPCL connection, ensuring you have the right documents is crucial for a smooth process. Whether you’re in an urban or rural area, NPCL has specific requirements tailored to your location. Here’s a checklist of necessary documents for a new NPCL connection:

For Urban Applicants:

1. Photographs:

  • 1 Passport-size photograph of the applicant.

2. ID Proof:

  • Aadhaar Card & Pan Card.

3. Address Proof:

  • Aadhaar Card (Alternative: Voter Card/Driving license/telephone bill/passport/bank passbook/gas connection bill).

4. Ownership Proof:

  • a) Registered Sale Deed/Lease Deed by GNID/UPSIDC (Complete Photo on both sides).
  • b) NOC on Rs. 10 Non-Judicial Stamp Paper: Self-attested ID Proof of Co-owner (in case of joint property).

5. Building Completion Certificate:

  • Issued by GNIDA/UPSIDC.

6. Rented Property Case:

  • a) Registered Rent Agreement & Owner’s registered lease deed.
  • b) Owner’s consent letter on Rs. 100 Non-Judicial Stamp Paper (Proof of Co-owner for joint property).

7. B&L Form for >5Kw:

  • Certified by a Licensed Electrical Contractor.

8. Self-attestation of Documents:

  • Mandatory for all documents.

For Rural Applicants:

1. Photographs:

  • a) 1 Passport-size photograph of the applicant.
  • b) 1 House Photograph (For Rural connection).

2. ID Proof:

  • Aadhar card & PAN card.
  • For female applicants: Both husband and father-in-law’s ID Proof.
  • For male applicants: Father’s ID Proof.

3. Address Proof:

  • Aadhaar Card (Alternative: Voter Card/Driving license/telephone bill/passport/bank passbook/gas connection bill).

4. Ownership Proof:

  • a) Khasar & Khatauni (Agricultural Land).
  • b) Sale Deed (in case of Freehold or Agricultural Property, Complete set photocopy on both sides).
  • c) Undertaking by way of Affidavit on Rs. 10/- Stamp paper (Notarised)*
  • *If ownership proof is not available with the Rural Applicant.

5. Rented Property Case:

  • a) Registered Rent Agreement & Owner’s registered lease deed.
  • b) NOC on Rs. 10 Non-Judicial Stamp Paper (with self-attested ID Proof of co-owner) (in case of joint property).

6. B&L Form for >5Kw:

  • Certified by a licensed Electrical Contractor.

Procedure to Apply for New NPCL Connection

Applying for a new NPCL connection is a straightforward process that can be done conveniently either online or in person. Here’s a simple guide to help you through the procedure:

Online Application

1. Fill out the Application Form: Visit the NPCL website and fill out the online Application Form to generate a New Connection Request.

2. Submission: Submit the completed form electronically through the online portal.

Offline Application (In-Person)

1. Download the Application Form:

2. Fill out the Form: Fill in the required details accurately.

3. Document Submission: Submit the filled form along with the necessary documents at the NPCL Head Office.

4. Assistance at Reception: If you require any assistance during the submission process, the personnel at the Reception Counter will be more than happy to help you.

Application Fees for New NPCL Connection and Payment Options

When seeking a new NPCL connection, it’s crucial to familiarise yourself with the associated application fees and the diverse payment options available. Here’s a breakdown of the essential details:

1. Application Fees

Application fees play a pivotal role in covering administrative and processing expenses related to setting up your new connection. The specific amount may vary, and you can find detailed information on the NPCL website.

2. Security Deposit

A refundable security deposit is a standard requirement for new connections. It is determined based on sanctioned load and connection type. The exact deposit amount pertinent to your situation will be provided during the application process.

3. Meter Charge

In addition to application and security deposit fees, there’s a one-time meter charge. This fee encompasses the installation and maintenance of the meter, with the precise amount contingent on the meter type chosen for your connection.

4. Service Line Charges

Service line charges cover the cost of laying cables from the nearest distribution box to your premises. These charges are part of the overall expenses to consider when applying for a new connection.

5. Processing Fee

A processing fee is applicable to handle the administrative aspects of your new connection application. This fee ensures efficient and timely processing of your application.

6. Payment Options

NPCL provides a range of convenient payment options tailored to your preferences:

  • Online Payments: Make secure and hassle-free payments through the official NPCL website or the NPCL Mobile App.
  • Bill Payment Centres: Convenient in-person payments can be made at designated bill payment centres.
  • Authorised Banks: Utilise authorised banks for additional flexibility in settling your fees.
  • Cash/Cheque Payments: If you prefer cash or cheque payments, visit NPCL O&M (Operation & Maintenance) offices for a straightforward transaction.

NPCL is committed to offering multiple payment avenues to make the process as convenient as possible for applicants. Whether online, at a payment centre, or through a bank transaction, NPCL ensures a smooth and accessible payment experience, facilitating your new connection application.

NPCL Online New Connection: Inspection and Approval Process

Securing a new NPCL connection involves a pivotal inspection and approval stage, a critical step for a seamless connection experience. Let’s break down the essential steps to navigate this process effectively:

1. Application Verification

  • NPCL initiates the process by meticulously verifying your application, ensuring that all required documents are in order.

2. Site Inspection

  • An NPCL official conducts a comprehensive site inspection at your property to evaluate the feasibility of the connection.
  • The inspection includes assessing the property’s location, determining the proposed site for the meter box, and identifying the service line entry point.
  • The team measures distances, evaluates potential cable routes, and determines the required cable size.

3. Estimation of Costs

  • Based on the site inspection findings, NPCL provides an estimate of the total costs involved, covering the security deposit, meter charge, service line charges, and any applicable fees.

4. Confirmation Letter

  • Upon approval post-inspection, you’ll receive a confirmation letter from NPCL detailing estimated costs, connection specifics, and the anticipated installation timeline.

5. Payment of Fees

  • Following the confirmation, it’s time to make the required payments, including the security deposit, meter charge, service line charges, and any processing fees.
  • Retain all payment receipts for future reference.

6. Coordination for Installation

  • After processing payments, coordinate with NPCL to schedule the installation.
  • A skilled team of NPCL technicians will handle the installation process at your location.

7. Final Checks

  • During installation, NPCL technicians conduct final checks to ensure proper connections, grounding, and adherence to safety standards.

8. Connection Activation

  • Upon successful installation and checks, NPCL activates your new connection.
  • You’ll be provided with the initial meter reading and a consumer number for future billing purposes.

9. Post-Installation Responsibilities

  • After activation, arrange for internal wiring within your premises, preferably by hiring a licensed electrician.
  • Obtain all necessary electrical safety certificates for verification.

10. Stay Informed

  • Stay updated on NPCL policies and procedures by regularly checking the official website or contacting customer support for updates.

Key Reminders:

  • Be present during the site inspection to address queries or concerns.
  • Prioritise safety measures during installation for a secure and reliable connection.
  • Safely store essential documents, including confirmation letters and payment receipts, for future reference.

Detailed Process of NPCL Meter Installation

You’re on the verge of powering up your space with a new NPCL connection! Here’s the comprehensive process of meter installation:

Pre-Installation Preparations:

After completing the application process, settling the required fees (security deposit, meter charge, service line charges, and processing fee), and receiving the confirmation letter from NPCL, you’re all set for the next step.

Installation Day:

On the scheduled day, a team of skilled NPCL technicians will arrive promptly at your property, armed with the necessary tools and materials.

Meter Box Installation:

  • The technicians will carefully identify the designated location for the meter box, usually situated outside your property near the main power line entry point.
  • Using specialised drills and equipment, they will securely affix the meter box onto the wall or the designated surface.

Service Line Laying:

  • The team will undertake the task of trenching or laying the service line cable from the nearest distribution box to your property.
  • This process may involve digging, installing protective conduit pipes, and ensuring the proper routing of cables.

Safety First:

  • Throughout the entire installation process, the technicians prioritise safety measures. They don protective gear, use insulated tools, and maintain safe distances from live wires, ensuring a secure working environment.

Connection and Meter Activation:

  • Once the meter box and service line are successfully installed, the technicians conduct final checks to ensure impeccable connections, grounding, and compliance with safety standards.
  • Following these rigorous checks, they activate the connection, bringing electricity into your property.
  • You’ll be provided with the initial meter reading and a consumer number for future reference and convenient bill payments.

Post-Installation Responsibilities

Internal Wiring:

  • Remember, internal wiring within your premises is your responsibility. Engage a licensed electrician to expertly connect the main supply to your internal electrical system.

Safety Certificates:

  • Obtain all the necessary electrical safety certificates from your electrician. These certificates ensure safety and serve as verification and peace of mind.

Record-Keeping:

  • Maintain a record of all payment receipts and connection documents for future reference.

By following these steps, you’ll seamlessly navigate the NPCL meter installation process, bringing reliable electricity to your property.

Activating Your New NPCL Connection

As you gear up for the activation of your freshly minted NPCL connection, here’s a straightforward guide to steer you through the process:

1. Final Checks:

  • NPCL technicians conduct meticulous inspections of all components, ensuring proper installation and adherence to stringent safety standards.

2. Meter Reading and Consumer Number:

  • As part of the activation process, you’ll receive the initial meter reading, marking the starting point for tracking your energy consumption.
  • You’ll also be assigned a consumer number, a crucial identifier for billing and communication purposes.

3. Connection Activation:

  • NPCL takes the necessary steps to activate your connection, seamlessly integrating it into the power grid.

4. Testing the Connection:

  • Rigorous testing procedures are employed by NPCL to guarantee the stability and reliability of your newly established connection.

5. Notification:

  • A confirmation notification from NPCL will reach you through email, SMS, or a physical letter, reassuring you that your connection is up and running smoothly.

6. Billing Cycle Start:

  • Your monthly billing cycle is scheduled to commence around the 25th of each month, providing a clear timeline for tracking your electricity consumption.

7. Internal Wiring:

  • Entrust the task of internal wiring to a licensed electrician post-activation. They ensure that the connection from the main supply to your internal electrical system is handled with expertise and adherence to safety standards.

8. Post-Activation Tips:

  • After activation, closely monitor your usage to manage energy efficiently.
  • Keep your connection details easily accessible for reference.
  • Stay informed about any updates or changes in NPCL policies and procedures.

With these steps, your NPCL connection activation process is simplified, ensuring a smooth and informed experience as you embark on this new phase of electrifying your space.

How to Make Monthly NPCL Bill Payments?

Online Payment

  • For registered users, simply login to your NPCL account to make quick and hassle-free payments.
  • If you are an unregistered user, use the Quick Bill Pay option for a swift payment process.
  • NPCL provides the option to pay through BBPS (Bharat Bill Payment System), streamlining the payment process. Click [here] to proceed.
  • If you have a prepaid meter, NPCL offers a dedicated platform for easy meter recharge. Click [here] to recharge your prepaid meter.

Offline Payment at Designated Centres

  • Find the nearest authorised bill payment centre on the NPCL website or app.
  • Visit the centre with your bill copy and cash or cheque.
  • Present your bill and make the payment.
  • Receive a receipt for your payment.

NoBroker Pay

  • Access the “Payments” section on the NoBroker platform.
  • Select “Utilities” and then “NPCL bill.”
  • Enter your consumer or account number.
  • Verify bill details and amount.
  • Choose your preferred payment method (wallet, debit/credit card, UPI).
  • Complete the payment.
  • Receive a confirmation receipt within the platform and via email or SMS.

UPI Apps (Paytm, Google Pay, PhonePe, etc.)

  • Open your preferred UPI app.
  • Select “Bill Payments” and choose “Electricity.”
  • Find “NPCL Bill Payment.”
  • Enter your consumer or account number.
  • Verify bill details and amount.
  • Confirm payment using your UPI PIN.
  • Receive a confirmation receipt within the app and via email or SMS.

With these accessible options, NPCL aims to make your monthly bill payments convenient and efficient. Choose the method that suits you best and ensure timely payments for a hassle-free electricity experience.

NPCL Contact and Support Details

Ensuring a seamless customer experience, NPCL provides accessible contact and support options for your queries and concerns. Here are the key details to reach out:

  • 24*7 Call Center / Customer Care Number: Call: 0120 – 622 6666
  • No Power Complaint E-mail: npc@noidapower.com
  • General Query Complaint E-mail: crm@noidapower.com
  • For further details and to explore additional contact options, visit their Contact Over Phone page now.

Feel free to reach out to NPCL’s dedicated support channels to address any issues, seek information, or provide feedback. NPCL is committed to ensuring your queries are promptly addressed, contributing to a reliable and customer-friendly power distribution experience.

Experience Brilliance: NPCL New Connections and NoBroker Pay

In the journey towards a brighter tomorrow with your NPCL new connection, there’s one more step to elevate your experience. Opt for NoBroker Pay – the smart choice for seamless bill payments, offering exclusive discounts and rewards on various utilities. Simplify your NPCL bill settlements with a platform designed for convenience.

Make NoBroker Pay your go-to for managing NPCL and other utility expenses, amplifying savings effortlessly. For a future where convenience meets affordability, switch to NoBroker Pay today! Light up your life with NPCL, and power your savings with NoBroker Pay.

FAQ’s

How can I check my NPCL new connection status?

Easily track your NPCL new connection status by visiting the official NPCL website or contacting their 24*7 customer care for real-time updates.

What are the NPCL new connection charges?

NPCL new connection charges vary based on factors like sanctioned load and connection type. For precise details, check the NPCL website or contact their customer support.

Can I apply for an NPCL new connection online?

Yes, NPCL offers a convenient online application process. Easily initiate your new connection request from the comfort of your home.

Where can I find the NPCL new connection form?

You can easily access the NPCL new connection form on the official NPCL website under the ‘Services’ or ‘New Connections’ section.

How can I check my NPCL application status?

To track your NPCL application status, visit the official NPCL website and use the dedicated online portal or contact their 24/7 call centre at 0120 – 622 6666.

TSSPDCL New Connection: Eligibility, Documents, Charges and More

TSSPDCL New Connection: Eligibility, Documents, Charges and More

Southern Power Distribution Company of Telangana Limited (TSSPDCL) has gone digital to simplify power connection applications. Residents can apply for a TSSPDCL new connection onlinewithout in-person visits. This blog covers eligibility, fees, step-by-step methods, and timescales for establishing a new TSSPDCL connection online, making the process easy.

Eligibility For TSSPDCL New Connection Online: Ensuring a Smooth Start

Before applying for a TSSPDCL new connection online, you must fulfil the eligibility requirements and have the relevant documentation. This section provides a complete summary of everything you need to know to apply smoothly.

Meeting the Eligibility Benchmarks:

To qualify for a new TSSPDCL connection, you must fulfil these fundamental requirements:

  • Residency: Being a bona fide resident of Telangana is paramount.
  • Property Ownership: Possessing valid ownership documents for the premises under your name is critical.
  • No Dues: Ensuring no outstanding dues exist for the property, either electricity bills or property taxes, is essential.

Service Areas Covered by TSSPDCL: Powering Telangana 

The TSSPDCL serves 11.1 million customers by covering 15 districts: Mahabubnagar, Narayanpet, Nalgonda, Yadadri Bhuvanagiri, Suryapet, Siddipet, Medchal, Wanaparthy, Nagarkarnool, Jogulamba Gadwal, SangaReddy, Hyderabad, Vikarabad, and Rangareddy.

Document For  New TSSPDCL New Connection Online

The paperwork needed for a new service registration

For Concerning HT Services:

1) Ownership Records

2) The partnership deed, articles of association, and memorandum of understanding) Approval from CEIG (If Applicable)

For LT Services:

1) ID proof (passport, voter card, PAN, driving license, or Aadhar)

2) Ownership Records (registered lease, gift, or sale deed)

3) Pass Book/Patta Document (If Applicable in the Case of Agriculture Customers)

4) MRO certificate (only applicable to SC/ST customers)

5) A passport-sized picture

Load Categories and Charges: Tailored to Your Needs

Navigating the world of new TSSPDCL connections can seem daunting, especially when deciphering load categories and TSSPDCL new meter connection charges. Worry not! This section serves as your comprehensive guide, demystifying the different load options and ensuring you choose the perfect fit for your electrical needs while staying within budget.

Understanding Load Categories 

Choosing the right load category for TSSPDCL new meter connection to apply online is crucial for a seamless application and future electrical usage. TSSPDCL offers a diverse spectrum of categories, each designed for specific needs:

A nominal fee is levied for processing your application, varying based on category (typically ranging from Rs. 100 to Rs. 500). The cost of the electricity meter, if not already installed (applicable for higher load categories and can range from Rs. 1,000 to Rs. 5,000). Refer to the below table for more info. 

CategoryFixed/Demand ChargeEnergy Charge
UnitRs./Unit/month(Rs./kWh/ Rs./kVAh)
Low Tension
LT-I: Domestic
LT-I(A): Upto 100 Units/Month
0-50kW101.95
51-100kW103.10
LT-I(B)(i): Above 100 Units/ Month& up to200 Units/ Month
0-100kW103.40
101-200kW104.80
LT-I(B)(ii): Above 200 Units/Month
0-200kW105.10
201-300kW107.70
301-400kW109.00
401-800kW109.50
Above 800 unitskW1010.00
LT-II: Non-Domestic/Commercial
LT-II(A): Upto 50 Units/Month
0-50kW607.00
LT-II(B): Above 50 Units/Month
0-100kW708.50
101-300kW709.90
301-500kW7010.40
Above 500kW7011.00
LT-II(C): Advertisement HoardingskW7013.00
LT-II(D): Haircutting Salons consumingupto 200 units/month
0-50kW605.30
51-100kW606.60
101-200kW607.50
LT-III: Industry
IndustrieskW757.70
Seasonal Industries (off- season)kW758.40
Pisciculture/Prawn culturekW366.20
Sugarcane crushingkW366.20
Poultry farmskW657.00
Mushroom, Rabbit, Sheep and ckW757.30

Decoding the Charge Spectrum For TSSPDCL New Meter Connection Online

Once you’ve chosen your category, prepare to encounter a set of associated charges for TSSPDCL new meter connection online:

  • Application Fee: A nominal fee levied for processing your application, varying based on the chosen category.
  • Security Deposit: A refundable amount collected as a guarantee, calculated based on the load capacity.
  • Development Charges: A contribution towards infrastructure development, determined by load, category, and location.
  • Meter Cost: The cost of the electricity meter, if not already installed (generally applicable for higher load categories).
  • Energy Charges: Variable charges based on your actual electricity consumption per unit (kWh). Different tariffs apply for different categories and time-of-day usage.

TSSPDCL provides transparent information on fees on their website and mobile app. Before initiating the application process, you can readily estimate the total cost associated with your chosen load category.

Online Registration Process: A Step-by-Step Guide

Conquering the online application process for a new TSSPDCL connection may feel like navigating an intricate labyrinth, but fear not, intrepid explorer! This detailed guide equips you with the knowledge and confidence to traverse each corridor seamlessly, ensuring a smooth journey towards illuminating your space.

Gather Your Provisions:

Before starting, ensure you have the following things handy:

  • Mobile Phone: Your trusted companion will carry the vital OTP for verification.
  • Valid Email Address: Stay updated on application progress and receive crucial notifications.
  • Scanned Documents: Keep digital copies of required documents readily accessible for upload.
  • Load Category Knowledge: Domestic, commercial, industrial – know your electrical needs!

Charting Your Course:

Base Camp: TSSPDCL Portal:

First Ascent: New Service Registration:

  • Click the “New Service Registration” button – your ascent begins!
  • Enter your mobile number and verify it with the received OTP – establish your base camp securely.
  • Provide your name, address, and email address – let TSSPDCL know where to find you.

Choosing Your Path: Load Category:

  • Domestic, commercial, industrial – navigate to the category that aligns with your needs.
  • Refer to the “Load Categories and Charges” section for informed decision-making.

Specifying Your Capacity:

  • State your desired kilowatts (kW) load capacity – gauge your future electrical demand.
  • Remember, choosing the suitable capacity optimizes cost-effectiveness and avoids unnecessary upgrades.

Documenting Your Journey:

  • Upload scanned copies of the required documents – your proof of identity and ownership.
  • Ensure clarity and completeness – blurry documents can create detours.

Reaching the Summit: Review and Submit:

  • Double-check all information for accuracy – a single misstep can cause delays.
  • Click “Submit” – congratulations, you’ve scaled the application peak!

Reaping the Rewards:

  • Estimated Cost Breakdown: TSSPDCL will send you a detailed breakdown outlining the application fee, security deposit, development charges, and meter cost.
  • Payment Portal: Choose your preferred online payment method and settle the charges – secure your connection! You can alway choose NoBroker Pay to pay instantly and securely. 

Monitoring Your Progress:

  • Track your TSSPDCL new meter connection status through the TSSPDCL website or mobile app using your registered mobile number.
  • Stay informed about verification, sanction order issuance, and installation scheduling.

Remember:

  • Save all application documents and receipts for future reference.
  • Contact TSSPDCL customer care (1912) for any assistance or queries.

Bonus Tip: Explore the TSSPDCL website for interactive tutorials and video guides on the online application process. Visual aids can be your best friends on this digital journey!

Payment and Fee Estimation: Financial Transparency

Conquering the online application process for your new TSSPDCL connection feels like scaling a mountain, and just like any summit, reaching the peak requires careful financial planning. This section delves into payment and fee estimation, equipping you with the knowledge to navigate this crucial stage confidently and transparently.

Payment Convenience:

Once you’ve received your estimated cost breakdown, TSSPDCL offers a range of secure and convenient online payment options:

  • Credit/Debit Cards: Make seamless payments using your preferred card.
  • Net Banking: Transfer funds directly from your bank account.
  • UPI: Utilize the Unified Payments Interface for a quick and efficient payment experience.
  • Demand Draft- Users can pay via bank Demand Draft. Make sure you know the TSSPDCL new meter connection dd amount before creating the DD.

Remember:

  • Keep all payment receipts and documents for future reference.
  • Contact TSSPDCL customer care if you encounter any challenges or require assistance with payment options.

By understanding the charge spectrum, utilizing the fee estimator tool, and choosing the correct payment method, you can navigate the financial aspects of securing your TSSPDCL new  connection online with confidence and transparency. Remember, informed decisions and intelligent financial planning pave the way for a smooth and budget-friendly journey towards illuminating your space.

This section emphasizes the importance of transparency and provides practical tips for optimizing your financial commitment. Additionally, it details the available payment options and encourages contacting customer care for assistance.

Connection and Meter Installation: Bringing Power to Your Premises

Once you’ve navigated the online application process and received your TSSPDCL sanction order, it’s time to witness the magic of electricity coming to life in your new space. This section dives into the crucial connection and meter installation stages, providing a roadmap to power up your premises.

Verification and Pre-Installation Checks:

  • TSSPDCL officials will physically visit your property to verify the details mentioned in your application.
  • They’ll assess the existing infrastructure, including cables, poles, and transformers, to confirm if they can support your desired load capacity.
  • Ensure clear access to the proposed meter installation location for smooth execution.

Schedule Your Installation:

  • You’ll receive a notification with your meter installation date and time slot. Choose a convenient time within the provided options.
  • Inform TSSPDCL if you need to reschedule, giving them ample notice for efficient planning.

Installation Day:

  • A team of qualified electricians from TSSPDCL will arrive at your premises on the scheduled date and time.
  • They’ll install the meter box securely at the designated location, adhering to safety and regulatory standards.
  • The connection will be established by running wires from the main line to your meter box.
  • A final inspection will ensure everything is functioning correctly and safely.

Power Up and Beyond:

  • Once approved, the power switch will be activated, illuminating your space with the promise of electrical convenience.
  • You’ll receive a receipt and official documents confirming your new connection and meter installation.
  • Keep these documents safe for future reference and as proof of your registered connection.

Additional Information:

  • Remember, you might be responsible for any internal wiring to connect the meter box to your appliances.
  • Consider consulting a licensed electrician to ensure safe and efficient internal wiring, particularly for heavy appliances.
  • TSSPDCL may require additional security deposits or charges based on specific installation requirements or complexities.

Troubleshooting Tips:

  • In case of delays or unforeseen issues during installation, politely inquire with the TSSPDCL team or contact customer care to know TSSPDCL new meter connection status.
  • Maintain clear communication and provide any necessary information or clarifications promptly.

Contacting TSSPDCL:

  • For queries or concerns during the connection and installation process, you can reach TSSPDCL through their website, mobile app, or toll-free helpline number (1912).
  • Their customer care representatives are available to assist you with any challenges or clarifications you may encounter. You can also do your TSSPDCL bill enquiry with service number on their website. 

With this information at your fingertips, you can confidently navigate the connection and meter installation process, paving the way for a seamless transition to the comfort and convenience of electricity in your new space. Remember, TSSPDCL is committed to ensuring a smooth and transparent experience for its customers, so don’t hesitate to reach out if you need any assistance.

TSSPDCL new connection online process demonstrates a significant shift towards digital convenience, empowering customers to quickly secure electricity for their premises. Consider NoBroker Pay if you want to save money and earn rewards on your TSSPDCL new connection and other utility payments. Make your new meter connection easy and pay the bill easily with NoBroker!

FAQ’s

Q: How can I use TSSPDCL’s online application process to get a new electrical connection?

Ans-Generally, it would help if you went to the “New Connection” or “Apply Online” part of the official TSSPDCL website. To complete the online application, refer to the instructions given.

Q:For a fresh connection application, which papers are necessary?

Ans-TSSPDCL may need documentation such as evidence of identification, proof of residence, and any other particular paperwork. For a list of necessary papers, see the official website.

Q: How long does it take to process a new connection application?

Ans-The time it takes to handle a new connection request is a common question from applicants. An approximate processing time may be found on TSSPDCL’s website or by contacting customer service.

Q: In what way may I pay for the new connection application?

Ans-Visit the official TSSPDCL website for acceptable payment options and the pricing schedule. For the convenience of candidates, online payment methods could be offered.

Q:Can I find out how my new connection application is doing?

Ans-Certain utilities provide applicants with an online monitoring mechanism to monitor the progress of their new connection application. For more information, visit the TSSPDCL website, ask about this function, or contact customer service.

New BESCOM Connection: Step-by-Step Process 2024

New BESCOM Connection: Step-by-Step Process 2024

The Bangalore Electricity Supply Company Limited (BESCOM) stands as a pivotal entity in the power distribution sector, serving the energy needs of the Bangalore Metropolitan Area (BMA) and several rural districts in Karnataka. Securing a new BESCOM connection is fairly easy these days, all thanks to the electricity board’s efforts. Let’s find out more about BESCOM’s documentation requirements, application procedures, associated charges, and post-connection considerations.

Service Areas Covered by BESCOM: Powering Karnataka’s Growth

BESCOM, the Bangalore Electricity Supply Company Limited, plays a crucial role in providing reliable electricity across Karnataka. Understanding the service areas covered by BESCOM is essential for residents, businesses, and industries seeking seamless power supply. Here’s a detailed overview of the regions served by BESCOM:

  1. Bangalore Metropolitan Area (BMA):
    1. Encompasses the vibrant city of Bangalore, often referred to as the “Silicon Valley of India.”
    2. BMA is a hub for technology, education, and various industries, making it a key economic centre.
  2. Bangalore Urban:
    1. Includes the urban areas of Bangalore city, characterised by residential, commercial, and institutional zones.
    2. Home to IT parks, educational institutions, and cultural landmarks.
  3. Bangalore Rural:
    1. Surrounding areas outside the city limits, consist of a mix of rural and semi-urban landscapes.
    2. Comprises agricultural regions, small towns, and emerging industrial zones.
  4. Ramanagara:
    1. Known for its scenic beauty and proximity to Bangalore.
    2. Hosts a blend of agricultural activities, silk production, and a growing industrial presence.
  5. Kolar:
    1. Historically significant for gold mining.
    2. A diverse economy, including agriculture, silk production, and a rising industrial sector.
  6. Chikkaballapura:
    1. Famous for its Nandi Hills, a popular tourist destination.
    2. Agriculture, horticulture, and sericulture contribute significantly to the local economy.
  7. Chitradurga:
    1. Recognised for its historical fort and as a major educational centre.
    2. Agriculture, handloom weaving, and small-scale industries are prominent.
  8. Tumkur:
    1. An industrial hub with a focus on manufacturing and processing industries.
    2. Agriculture and horticulture also contribute significantly to the economy.

RAPDRP vs. Non-RAPDRP Areas for Your New BESCOM Connection

Understanding whether your area falls under RAPDRP (Restructured Accelerated Power Development and Reforms Program) or Non-RAPDRP is crucial. Let’s take a look at the differences:

FeatureRAPDRP AreaNon-RAPDRP Area
InfrastructureUpgraded under the RAPDRP programOlder infrastructure, awaiting upgrades
Application ProcessOnline application and trackingOffline application and payment
Processing TimeGenerally fasterMay be slower
Additional FeaturesPotential for online bill payment, meterLimited online facilities

RAPDRP Areas

  1. Coverage:
    1. Specific regions within BESCOM’s jurisdiction.
    2. Underwent government-sponsored infrastructure upgrades.
  2. Benefits:
    1. Enhanced reliability and quality of power supply.
    2. Expedited processing of new connection applications.
    3. Access to online application and tracking facilities.
    4. Potential for additional features like online bill payment and meter reading.
  3. Application Process:
    1. Utilise the user-friendly online application portal on the BESCOM website.
    2. Conveniently track application progress and make payments online.

Non-RAPDRP Areas

  1. Coverage:
    1. Areas outside the RAPDRP program.
    2. Typically characterised by older infrastructure or awaiting upgrades.
  2. Application Process:
    1. Submit a physical application form at the nearest BESCOM O&M office.
    2. Offline application submission and payment processing. Manual BESCOM application status check. 

Types of Connections Offered by BESCOM

BESCOM is here to make sure you get the power you need, tailored to your specific requirements. Let’s break down the types of connections they offer

  • Domestic Connections (LT):
    • For homes with everyday needs like lights, fans, and appliances.
    • Rates vary based on how much electricity you use, with a fixed monthly charge.

Example: If you live in an apartment or house, this is probably what you need!

  • Commercial Connections (LT):
    • Perfect for shops, offices, and small businesses with a bit more power demand.
    • Rates are a bit higher, especially during peak usage times.

Example: If you own a shop or run a small office, this connection is for you!

  • Industrial Connections (HT):
    • Big power needs for factories and large workshops.
    • Charges get a bit technical, with separate costs for maximum power, total units used, and energy efficiency.

Example: If you’re running a big industrial setup, this connection suits your heavy-duty needs!

  • Agricultural Connections:
    • Special rates for farmers, especially for irrigation pumps.
    • It comes with its own unique set of rules and lower costs.

Example: If you’re a farmer needing power for your fields, this is the connection for you!

  • Other Special Connections:
    • Tailored for specific needs like streetlights, temporary events, and construction sites.
    • Keep in mind, that these might have their own special requirements.

Consideration: If you’re organising an event or setting up a temporary site, these connections cater to your unique needs!

Understanding BESCOM Tariff Structures For Different Types of Connection

Wondering how BESCOM calculates your electricity charges? Here’s a breakdown of the tariff structures for different types of connections:

Connection TypeBESCOM Charges
1. Domestic (LT)– Applicable to: Households with a sanctioned load up to 7 kW.
– Rate per Unit (Example):
– Up to 50 kWh: Rs 3.00
– 51 – 100 kWh: Rs 4.00
– 101 – 200 kWh: Rs 5.00
– Above 200 kWh: Rs 6.00
– Consumer Service Charge: Rs 20 per month.
2. Commercial (LT)– Applicable to: Shops, offices, hotels, etc., with a sanctioned load exceeding 7 kW.
– Rate per Unit (Example):
– Up to 100 kWh: Rs 5.00
– 101 – 500 kWh: Rs 6.00
– 501 – 1000 kWh: Rs 7.00
– Above 1000 kWh: Rs 8.00
– Peak Demand Charge: Rs 2 per kW per month.
3. Industrial (HT)– Applicable to: Factories and industrial units with a sanctioned load exceeding 100 kW.
– Complex Structure: Separate charges for demand, energy consumption, and power factor.
– Demand Charges: Based on the maximum power consumed during a specific period.
– Energy Consumption Charges: Based on the total units consumed.
– Power Factor Charges: Levied if the power factor falls below a certain threshold.
4. Agricultural– Subsidised Rates: Offered to farmers for irrigation pumps and other agricultural equipment.
– Lower Costs: Specific tariff schedules with lower costs compared to other categories.

Prerequisites for a New BESCOM Connection: Getting Ready for Power!

Before plugging into the BESCOM grid, make sure you’ve got everything sorted out. Here’s a simple checklist to ensure a smooth process for getting your new connection:

  1. Property Details:
    1. Ownership Proof: Make sure you have documents showing that you own or have the right to use the property where the connection will be installed.
    2. Site Plan: A basic sketch or plan of your property showing where you want the metre and service line entry point. This helps BESCOM plan the installation.
  2. Personal Identification:
    1. Proof of Identity: Provide a government-issued ID, like an Aadhaar card, passport, or voter ID, to confirm who you are.
  3. Load Capacity and Requirements:
    1. Determine Load Capacity: Figure out how much power you need based on your appliances and usage. This helps in selecting the right type of connection.
    2. Choose Metre Type: Decide whether you need a single-phase or three-phase metre based on your power requirements.
  4. Application Form:
    1. Complete Application Form: Whether online or at a BESCOM office, fill out the application form with accurate details about your property and electricity needs.
  5. Fees and Deposits:
    1. Application Fees: Be ready to pay a fee for processing your new connection application.
    2. Security Deposit: This is a refundable deposit based on your sanctioned load and connection type. The amount varies.

Necessary Documents for a New BESCOM Communication

Here’s a list of documents typically required for a new BESCOM connection:

Document CategoryFor Individual PropertiesFor Apartments/FlatsFor Rented Properties
1. Ownership Proof– Sale deed or registered lease agreement– Allotment letter from the builder– Rental agreement
– Khata certificate (property tax receipt)– Sale agreement or registered sale deed– NOC from the property owner
– Latest property tax paid receipt– Khata certificate (if available)
– A-khata or Khata extract (if available)– NOC from the apartment association
2. Identity Proof of the Applicant– Aadhaar card– Aadhaar card– Aadhaar card
– Voter ID card– Voter ID card– Voter ID card
– PAN card– PAN card– PAN card
– Passport– Passport– Passport
– Driving licence– Driving licence– Driving licence
3. Site Plan– Clear and detailed site plan of the property– Clear and detailed site plan indicating:– Clear and detailed site plan indicating:
– Boundary lines– Boundary lines– Boundary lines
– Building layout– Building layout– Building layout
– Proposed location for the metre box– Proposed location for the metre box– Proposed location for the metre box
– Service line entry point– Service line entry point– Service line entry point
4. Additional Documents (if applicable)– NOC from local authorities (e.g., if in a sensitive area)– NOC from local authorities (if required)– NOC from local authorities (if required)
– NOC from other utility providers (if cables near existing lines)– NOC from other utility providers (if required)– NOC from other utility providers (if required)
– Caste certificate (if applicable for subsidies)– Caste certificate (if applicable for subsidies)– Caste certificate (if applicable for subsidies)
– Any other documents specified by BESCOM– Any other documents specified by BESCOM– Any other documents specified by BESCOM

Procedure to Apply for New BESCOM Connection

Applying for a new BESCOM connection involves a series of steps, both online and offline. Here’s a detailed guide to help you through the application process:

Online Application Procedure

  • Step 1: Visit the BESCOM Website:
  • Step 2: Create an Account:
    • If you don’t have an account, create one on the website. Provide the required details such as your name, contact information, and email address.
  • Step 3: Login to Your Account:
    • Log in to your newly created account using the credentials you provided during registration.
  • Step 4: Select “New Connection”:
    • Navigate to the “New Connection” section on the website. This is typically found in the “Services” or “Customer Services” menu.
  • Step 5: Fill Out the Online Application Form:
    • Complete the online application form with accurate details about your property, load requirements, and desired metre type.
  • Step 6: Upload Required Documents:
    • Upload scanned copies of necessary documents, including proof of identity, proof of residence, property documents, and any other documents specified by BESCOM.
  • Step 7: Pay Application Fees:
    • Make the required payment for application fees, security deposit, and any other applicable charges using the online payment options provided on the website.
  • Step 8: Submit Application:
    • Review all the information entered, ensure documents are correctly uploaded, and submit the application online.

Offline Application Process

  • Step 1: Visit the Nearest BESCOM Office:
    • Locate the nearest BESCOM office in your area. You can find office addresses on the official website or by contacting BESCOM customer support.
  • Step 2: Collect Application Form:
    • Request the new connection application form from the BESCOM office. Fill out the form with accurate details.
  • Step 3: Submit Required Documents:
    • Along with the filled application form, submit photocopies of essential documents, including proof of identity, proof of residence, property documents, and any other documents specified by BESCOM.
  • Step 4: Pay Application Fees:
    • Make the necessary payment for application fees, security deposit, and other charges at the BESCOM office. Obtain a receipt for your records.
  • Step 6: Application Verification:
    • BESCOM officials will review your application and may conduct a site visit to assess the feasibility of the new connection.
  • Step 7: Receive Confirmation:
    • Once your application is approved, you will receive a confirmation letter from BESCOM, specifying the estimated timeline for the next steps.

Application Fees and Payment Options

  • Application Fees:
    • Application fees cover administrative costs and processing expenses. The amount may vary, and details are available on the BESCOM website.
  • Security Deposit:
    • A refundable security deposit is based on the sanctioned load and connection type. The deposit amount will be specified during the application process.
  • Metre Charge:
    • A one-time fee for metre installation and maintenance. The specific amount depends on the type of metre chosen.
  • Service Line Charges:
    • The cost associated with laying cables from the nearest distribution box to your premises.
  • Processing Fee:
    • An administrative fee for processing your new connection application.
  • Payment Options:
    • Payments can be made online through the BESCOM website or BESCOM Mithra app, at designated bill payment centres, through authorised banks, or in cash/cheque at BESCOM O&M offices.

BESCOM New Connection: Inspection and Approval Process

You’ve applied for a new BESCOM connection, and now it’s time for the crucial inspection and approval stage. Here’s a step-by-step guide to what you can expect:

  1. Application Verification:
    1. BESCOM will first verify your application and ensure that all necessary documents are in order.
  2. Site Inspection:
    1. A BESCOM official will visit your property to assess the feasibility of the connection.
    2. The inspection will involve checking the property’s location, the proposed site for the metre box, and the service line entry point.
    3. The team may measure distances, assess potential cable routes, and determine the required cable size.
  3. Estimation of Costs:
    1. Based on the site inspection, BESCOM will estimate the total cost involved in providing the new connection.
    2. This may include security deposit, metre charge, service line charges, and any other applicable fees.
  4. Confirmation Letter:
    1. If your application is approved after the inspection, you’ll receive a confirmation letter from BESCOM.
    2. The letter will outline the estimated costs, details of the connection, and the expected timeline for installation.
  5. Payment of Fees:
    1. Upon receiving the confirmation letter, you’ll need to make the necessary payments, including the security deposit, metre charge, service line charges, and any processing fees.
    2. Ensure you keep the payment receipts for future reference.
  6. Coordination for Installation:
    1. Once the payments are processed, coordinate with BESCOM for the installation schedule.
    2. BESCOM will send a team of technicians to install the metre box, lay the service line, and activate the connection.
  7. Final Checks:
    1. During installation, the BESCOM technicians will perform final checks to ensure proper connections, grounding, and safety compliance.
  8. Connection Activation:
    1. Following successful installation and checks, BESCOM will activate your new connection.
    2. You’ll receive the initial metre reading and consumer number for future billing.
  9. Post-Installation Responsibilities:
    1. Arrange for internal wiring within your premises. Remember, this is your responsibility, and it’s recommended to hire a licenced electrician.
    2. Obtain all necessary electrical safety certificates from your electrician for verification.
  10. Stay Informed:
    1. Stay informed about the latest BESCOM policies and procedures. Check the official website or contact customer support for any updates.

Key Reminders:

  • Be present during the site inspection to address any queries.
  • Ensure safety measures are followed during the installation process.
  • Keep all documents, including confirmation letters and payment receipts, for future reference.

Detailed Process of BESCOM Metre Installation

You’re on the verge of powering up your space with a new BESCOM connection! Here’s an in-depth guide to the metre installation process:

  1. Pre-Installation Preparations:
    1. You’ve completed the application process, paid the necessary fees (security deposit, metre charge, service line charges, and processing fee), and received the confirmation letter from BESCOM.
  2. Installation Day:
    1. A team of skilled BESCOM technicians will arrive at your property at the scheduled time with the required tools and materials.
  3. Metre Box Installation:
    1. The technicians will identify the designated location for the metre box, usually outside your property near the main power line entry point.
    2. Using appropriate drills and equipment, they will securely mount the metre box onto the wall or designated surface.
  4. Service Line Laying:
    1. The team will trench or lay the service line cable from the nearest distribution box to your property.
    2. This may involve digging, laying protective conduit pipes, and ensuring proper cable routing.
  5. Safety First:
    1. Throughout the process, the technicians will prioritise safety measures such as wearing protective gear, using insulated tools and maintaining safe distances from live wires.
  6. Connection and Metre Activation:
    1. Once the metre box and service line are installed, the technicians will perform final checks for proper connections, grounding, and safety compliance.
    2. Following successful checks, they will activate the connection, bringing electricity to your property.
    3. You’ll receive the initial metre reading and consumer number for future reference and bill payments.
  7. Post-Installation Responsibilities:
    1. Internal Wiring: Remember, internal wiring within your premises is your responsibility. Hire a licenced electrician to safely connect the main supply to your internal electrical system.
    2. Safety Certificates: Obtain all necessary electrical safety certificates from your electrician for verification and peace of mind.
    3. Keep all payment receipts and connection documents for future reference.

Activating Your New BESCOM Connection

You’re just a step away from lighting up your space with your new BESCOM connection! Here’s a guide on what to expect during the activation process:

  • Final Checks: BESCOM technicians ensure all components are properly installed and meet safety standards.
  • Metre Reading and Consumer Number: You get the initial metre reading and a consumer number for billing and communication.
  • Connection Activation: BESCOM activates your connection, integrating it into the power grid.
  • Testing the Connection: BESCOM tests ensure stability and reliability.
  • Notification: You receive confirmation via email, SMS, or letter.
  • Billing Cycle Start: Monthly billing starts around the 25th.
  • Internal Wiring: Ensure a licenced electrician handles internal wiring.
  • Post-Activation Tips: Monitor usage, keep details handy, and stay informed about updates.

How to Make Monthly BESCOM Bill Payments 

Here’s how you can make regular BESCOM bill payments:

Online Payment via BESCOM Website

  • Visit the BESCOM website: BESCOM Online Bill Payment.
  • Navigate to the “Online Bill Payment” section.
  • Enter your consumer or account number.
  • View your bill details and select your preferred payment method (debit/credit card, net banking, payment gateways).
  • Enter payment details and confirm the transaction.
  • Receive a confirmation receipt via email or SMS.

Payment via BESCOM Mithra App

  • Download and install the BESCOM Mithra app on Android or iOS.
  • Register or log in using your consumer number or phone number.
  • View your current bill details and choose the payment method (debit/credit card, net banking, UPI platforms).
  • Enter payment details and confirm the transaction.
  • Receive a confirmation receipt within the app and via email or SMS.

UPI Apps (Paytm, Google Pay, PhonePe, etc.)

  • Open your preferred UPI app.
  • Select “Bill Payments” and choose “Electricity.”
  • Find “Bangalore Electricity Supply Company Limited (BESCOM).”
  • Enter your consumer or account number.
  • Verify bill details and amount.
  • Confirm payment using your UPI PIN.
  • Receive a confirmation receipt within the app and via email or SMS.

NoBroker Pay

  • Access the “Payments” section on the NoBroker platform.
  • Select “Utilities” and then “BESCOM bill.”
  • Enter your consumer or account number.
  • Verify bill details and amount.
  • Choose your preferred payment method (wallet, debit/credit card, UPI).
  • Complete the payment.
  • Receive a confirmation receipt within the platform and via email or SMS.

Offline Payment at Designated Centres

  • Find the nearest authorised bill payment centre on the BESCOM website or app.
  • Visit the centre with your bill copy and cash or cheque.
  • Present your bill and make the payment.
  • Receive a receipt for your payment.

Payment at Authorised Banks

  • Check with your bank for BESCOM bill payment availability and instructions.
  • Provide your consumer or account number for accurate processing.
  • Make the payment over the counter or through online banking.
  • Receive a confirmation message or slip from the bank.

Cash/Cheque Payment at O&M Offices

  • Find the nearest BESCOM O&M office on the website or app.
  • Visit the office with your bill copy, cash, or cheque.
  • Present your bill and make the payment.
  • Receive a receipt for your payment.

BESCOM Contact and Support Details

Contact MethodDetailsAvailabilityPurpose
Phone24×7 Helpline: 191224/7Power outages, metre issues, bill enquiries, concerns
Consumer Cell: 080-22289999Mon-Fri (9:00 AM to 6:00 PM)General enquiries, bill clarifications, complaints
OnlineBESCOM Website: https://bescom.karnataka.gov.in/englishOnline 24/7Bill payments, duplicate bills, complaints, information
BESCOM Mithra App: Available on Android and iOSOnline 24/7Bill payments, complaints, metre readings, load management
OfflineO&M Offices: Nearest office location [Check on BESCOM website or app]Office hoursBill payments, connection applications, complaints, enquiries
Customer Service Counters: In bill payment centres and designated locationsOffice hoursBill payments, complaints, enquiries
Social MediaBESCOM Facebook: https://www.facebook.com/bescomblr/24/7 (Online)Updates, announcements, customer engagement
BESCOM Twitter: https://twitter.com/NammaBESCOM24/7 (Online)Updates, announcements, customer engagement
BESCOM YouTube: https://m.youtube.com/watch?v=EPd9gyFylyI24/7 (Online)Information, tutorials, customer engagement

Congratulations! Your new BESCOM connection is now active, and your space is ready to embrace the benefits of reliable and consistent electricity. And for the savvy user looking for the best deals and perks, consider exploring NoBroker Pay for exclusive discounts and rewards on your BESCOM and other utility payments. If you have any questions or face any issues post-activation, don’t hesitate to contact BESCOM customer support for assistance. Enjoy your powered-up space with BESCOM and NoBroker!

FAQ’s

1: How can I apply for a new BESCOM connection?

You can apply for a new BESCOM connection by visiting their official website or the nearest BESCOM office. Fill out the application form, submit the necessary documents, and pay the required fees.

2: What are the documents required for a new BESCOM connection?

Documents typically include ownership proof, identity proof, site plan, and additional documents based on the property type. Check the official BESCOM website for a detailed list.

3: What are the types of connections offered by BESCOM?

BESCOM offers domestic, commercial, industrial, agricultural, and special connections for various purposes. Choose the type based on your electricity needs.

4: How are BESCOM’s new connection charges calculated?

Connection charges include security deposit, metre charge, service line charges, and processing fee. The exact amount depends on the sanctioned load and type of connection.

5: What are the tariff structures for different types of connections?

Tariffs vary for domestic, commercial, and industrial connections. They are based on consumption slabs, sanctioned loads, and additional factors. Refer to the BESCOM website for detailed tariff schedules.

6: How can I check my BESCOM bill and make payments?

You can check your bill online through the BESCOM website or app. Payments can be made online through various modes such as debit/credit cards, net banking, UPI, and designated bill payment centres.

7: What is the process for metre installation?

After applying and receiving approval, BESCOM technicians will install the metre box and service line. Ensure the site is accessible, and safety measures are followed.

8: How long does it take for a new connection to be activated?

The activation timeline may vary. After successful installation, BESCOM will provide the metre reading and consumer number, allowing you to choose your tariff plan.

3 blog on bill payment in Bill payment

Leave a Reply

Your email address will not be published. Required fields are marked *

People Also Ask