How to Clean Kitchen Cabinets: Easy Steps to Clean Naturally at Home

Easy Cleaning Tips
3.2K Views
Table of Contents
Summary
Cleaning kitchen cabinets properly helps remove grease, stains, and dust without causing scratches or damage. Using the right tools, such as microfiber cloths and gentle cleaning solutions like vinegar and baking soda, keeps cabinets clean and shiny. Correct cleaning techniques not only improve appearance but also extend cabinet life. With simple methods, even oily marks, fingerprints, and built-up dirt can be removed easily, restoring freshness and order to the kitchen.
When Should You Clean Kitchen Cabinets?
Cleaning inside kitchen cabinets is essential to maintaining a healthy and hygienic kitchen environment. The frequency of cleaning depends on various factors such as usage, location, and the type of material the cabinets are made of. Some of the situations when you should consider cleaning your kitchen cabinets:
Recommended Reading

How to Clean Kitchen Exhaust Fan Properl...
14.6K Views
How to Clean Your Kitchen Sink: Simple S...
13.7K Views
14 Easy Kitchen Cleaning Tips for a Fres...
12K Views

How to Get Rid of Fruit Flies in Your Ki...
8K Views
How to Clean Microwave Oven: Quick and E...
6.6K Views
| Occasion | Why It’s Important | Frequency |
| Regular Maintenance | Prevents dust and grime build-up; keeps cabinets looking fresh. | Monthly wipe-down with mild detergent |
| After Cooking | Removes grease and food splatters before they set and become tough stains. | Immediately after cooking |
| Seasonal Deep Cleaning | Thorough cleaning of interiors and exteriors ensures hygiene and better organisation. | Once or twice a year |
| Before Pest Control | Enhances treatment effectiveness and prevents pest recurrence. | Before every pest control session |
| When Moving In/Out | Ensures cabinets are hygienic and ready for use by you or the next occupant. | At the time of moving |
How to Clean Kitchen Cabinets That Are Stained?
Cleaning stained kitchen cabinets can be challenging, but with suitable materials and elbow grease, you can get them to look new. Below are the steps on how to clean kitchen cabinets that are stained:
- Step 1: Prepare a Cleaning Solution: This is your first step in the cleaning process. You’ll need to mix a few drops of mild dish soap with warm water. The soap will help cut through any grease or grime on the cabinets, while the warm water will help dissolve the soap, making it more effective. Ensure the water is not too hot, as it can warp the wood.
- Step 2: Wipe Down the Cabinets: After preparing your cleaning solution, dip a microfiber cloth or sponge into it and wring it out well. You don’t want the fabric or sponge dripping wet, just damp. Wipe down the cabinets, paying particular attention to stained areas. The microfiber cloth or sponge is gentle enough not to scratch the wood but will still effectively clean the surface.
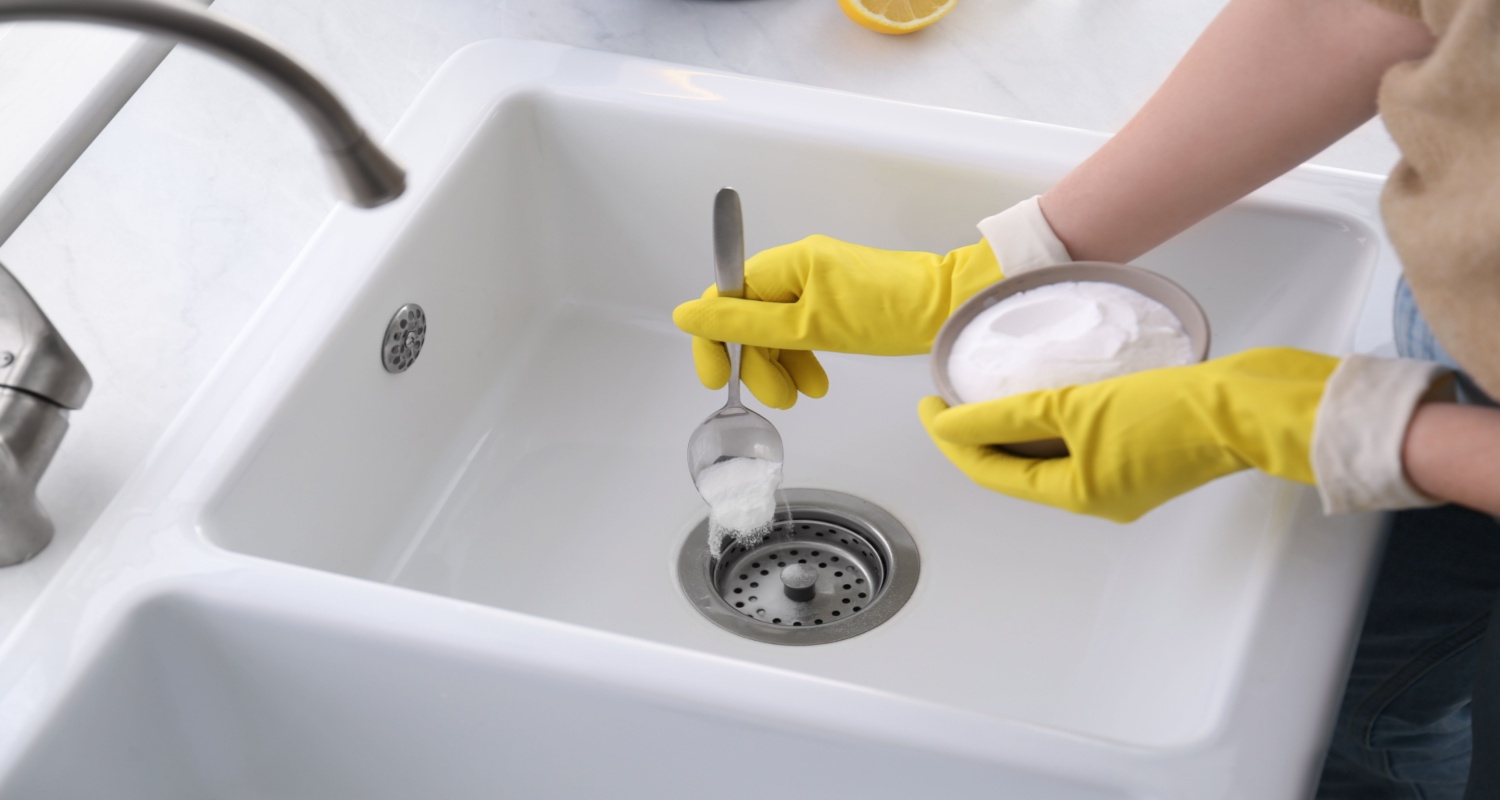
- Step 3: Tackle Tough Stains: If you notice that some stains are not coming off with the cleaning solution, you can use a paste made from baking soda and water. Baking soda is a gentle abrasive that can help to lift stubborn stains. Apply this paste to the stains and let it sit for a few minutes, then scrub gently with a cloth or sponge. Be careful not to scrub too hard, as you could scratch the wood. This is the right approach to the question: how to clean kitchen cabinets with baking soda.
- Step 4: Rinse and Dry: After you’ve cleaned the cabinets, it’s important to rinse them off with a cloth dampened with clean water. This will remove any soap or baking soda residue that could leave a film on the cabinets. After rinsing, dry the cabinets thoroughly with a clean, dry cloth. This will prevent water spots and streaks from forming.
- Step 5: Deodorise: If your cabinets have a lingering smell, you can deodorise them with equal parts of water and vinegar. Vinegar is a natural deodoriser that can help neutralise odours. Wipe down the cabinets with this solution, then dry thoroughly.
- Step 6: Polish (Optional): If you want to add shine to your cabinets, you can polish them with olive oil. Olive oil is a natural conditioner for wood and can help to restore its shine. Apply a small amount to a cloth and buff the cabinets until they shine. Be sure to use only a little oil, which can make the cabinets feel greasy.
How to Clean Kitchen Cabinets That Are Painted?
Now, you want to know how to clean painted kitchen cabinets, right? Cleaning painted kitchen cabinets is a delicate task, as the wrong cleaning materials could damage the paint. Follow these steps:
- Step 1: Gather Your Materials: Before cleaning, gather all the necessary materials. This includes mild dish soap, warm water, microfiber cloths, and a soft sponge. The mild dish soap will help remove grease and grime without damaging the paint, while the microfiber cloths and soft sponge allows you to clean without scratching the surface.
- Step 2: Create Your Cleaning Solution: Mix a few drops of dish soap with warm water in a bucket. The exact ratio isn’t crucial, but a good starting point is a teaspoon of soap for every quart of water. This solution will be gentle enough not to harm the paint, but effective enough to clean off dirt and grime.
- Step 3: Wipe Down the Cabinets: Dip a microfiber cloth into the solution, wring out the excess water, and gently wipe the cabinets. It’s essential to follow the grain of the paint to avoid streaks. This step should remove most of the surface dirt and dust.
- Step 4: Scrub Tough Stains: If there are tough stains or sticky spots, gently scrub them with the soft sponge dipped in the cleaning solution. Be careful not to scrub too hard, as it could damage the paint. If the stain still doesn’t come off, you might need to use a specialised cleaner, but always test it on an inconspicuous area first.
- Step 5: Rinse and Dry: After cleaning, rinse the cabinets with a cloth dampened with clean water. This will remove any soap residue. Then, dry them with a clean towel to prevent water spots or streaks. Any standing water can damage the paint over time, so dry the cabinets thoroughly.
- Step 6: Regular Maintenance: Regularly dusting your cabinets can prevent build-up that’s harder to remove. It’s recommended to clean your cabinets thoroughly every few months, depending on use. Regular maintenance will keep your cabinets looking their best and extend the life of the paint. Grease build-up on kitchen cabinets is a common problem caused by daily cooking. Over time, it makes surfaces look sticky, dull, and unhygienic. Here are a few ways to get rid of grease on kitchen cabinets:
- Warm Water & Dish Soap: Mix a few drops of mild dish soap in warm water and wipe with a microfiber cloth to gently dissolve grease.
- Vinegar Solution: Combine equal parts vinegar and warm water in a spray bottle, apply to greasy spots, and wipe clean.
- Baking Soda Paste: For stubborn grease, make a paste of baking soda and water, apply to the area, let it sit, then scrub gently.
- Lemon Juice Cleaner: Natural acidity in lemon helps cut through grease while leaving a fresh scent.
- Don’t Forget Handles & Hinges: Grease often collects on cabinet hardware; clean these areas thoroughly for best results.
How to Clean Wooden Kitchen Cabinets?
Cleaning wooden cabinets is necessary to keep your kitchen looking fresh and tidy. Over time, cabinets can accumulate grease, food particles, and dust, which can be challenging to remove. Follow this simple step-by-step process:
- Step 1: Prepare a Cleaning Solution: Firstly, you need to prepare an effective yet gentle cleaning solution on wooden surfaces. You can do this by mixing equal parts of white vinegar and water. This solution is mild and won’t harm the wood or its finish. If you’re not fond of the smell of vinegar, you can substitute it with a mild soap solution. Just remember to dilute the soap with water to ensure it’s not too harsh for the wood.
- Step 2: Clean the Cabinets : The next step involves cleaning the cabinets. This is particularly important after cooking when grease and food particles will most likely splatter onto the cabinet surfaces. Dip a clean cloth into the vinegar or soap solution you prepared earlier to clean the cabinets. I wore out the cloth to ensure it was damp but not dripping wet. Excessive moisture can damage the wood. Use a damp cloth to wipe down the cabinet doors and underneath the cabinets. Be sure to get into all the nooks and crannies where grease and grime can accumulate.
- Step 3: Dry the Cabinets: After you’ve wiped down the cabinets, it’s crucial to dry them thoroughly. Any moisture left on the wood can cause it to warp over time. To dry the cabinets, use a clean cloth to wipe over all the surfaces you’ve just cleaned. Make sure to remove all traces of the cleaning solution. This step protects the wood from damage and gives your cabinets a clean finish.
- Step 4: Clean Inside the Cabinets Regularly: It’s not just the outside of the cabinets that needs cleaning. Every few weeks, you should also clean the inside of the cabinets. Start by removing everything from your cabinets. Then, using the vinegar or soap solution, wipe out the inside of the cabinets.Be sure to clean all the shelves and the inside of the cabinet doors. Once you’ve cleaned the inside of the cabinets, dry them thoroughly with a clean towel. Only then should you put everything back inside.
- Step 5: Handle Spilled Food: If you often find food spills inside your cabinets, it might be worth investing in good-quality food storage containers. Glass or metal jars are great for storing spices and dry goods. They not only protect the food from bugs but also help to minimise spills. If food does spill inside your cabinet, don’t panic. Simply use a plastic putty knife to scrape off the dried food gently. This should remove most of the spill without scratching the finish on your cabinets. Once you’ve removed the bulk of the spill, use a soft rag dipped in dishwashing soap and warm water to clean the area. Again, remember to dry the area thoroughly once you’ve finished cleaning.
How to Clean Laminate Kitchen Cabinets?
Laminated kitchen cabinets are famous for their durability and variety of styles. However, they can attract dust and grime over time. Follow these simple steps on how to clean laminate kitchen cabinets:
- Step 1: Gather Your Supplies: Before you start, gather all the necessary cleaning supplies. This includes a gentle microfiber cloth that won’t scratch the surface. You’ll also need warm water and mild dish soap to create a gentle cleaning solution. Cleaning kitchen cabinets with baking soda is very effective, as it is an excellent natural abrasive that can help remove stubborn stains. Lastly, a soft sponge will help apply the baking soda paste and scrubbing.
- Step 2: Remove Excess Dust : Start by removing loose dust and dirt from the surface of the cabinets. A dry microfiber cloth is perfect for this task. Make sure to wipe all areas where dust can accumulate, including the corners and crevices.
- Step 3: Prepare a Soapy Solution: Next, prepare a mild cleaning solution. Add a few drops of dish soap to a bowl of warm water. The dish soap will help cut through grease and grime, while the warm water will help dissolve the soap and make cleaning easier.
- Step 4: Wipe Down the Cabinets: Now, it’s time to clean the cabinets. Dip your cloth into the soapy water, wring out the excess water, and then wipe down the cabinets. Pay special attention to areas around handles and edges, as these areas accumulate more grease and grime. Make sure to rinse the cloth frequently to avoid spreading dirt around.
- Step 5: Address Stubborn Stains: If you encounter stubborn stains or sticky spots, a paste made from baking soda and water can be very effective. Apply this paste to the stain using a soft sponge and gently scrub the area. The mild abrasive nature of baking soda helps to break down tough stains without damaging the laminate surface.
- Step 6: Rinse and Dry: After cleaning, it’s essential to rinse off any remaining soap or baking soda residue. Use a cloth dampened with clean water to do this. Finally, dry the cabinets thoroughly with a clean towel. This is an essential step, as allowing water to sit on the surface can cause damage to the laminate over time.
How to Clean Glass Kitchen Cabinets?
Cleaning glass kitchen cabinets can be simple if you follow the proper steps. Using suitable materials is essential to avoid scratching or damaging the glass. A simple guide:
- Step 1: Gather Your Materials: You need a microfiber cloth, a bucket, warm water, mild dish soap, and vinegar. The microfiber cloth is gentle on the glass and won't leave scratches. The dish soap and vinegar will work together to cut through grease and grime without damaging the glass.
- Step 2: Prepare the Cleaning Solution: Fill the bucket with warm water. The water's warmth helps dissolve the dish soap and vinegar, creating a more effective cleaning solution. Add a few drops of dish soap to help break down grease or oil on the glass. Then add a cup of vinegar; vinegar is a natural cleaner that can help to remove hard water stains and other residues.
- Step 3: Remove Dust and Debris: Before you start cleaning, removing any loose dust or debris from the glass is essential. This is because these particles can scratch the glass when you start to clean it. Use a dry microfiber cloth and gently wipe the glass.
- Step 4: Apply the Cleaning Solution: Dip the cloth into the cleaning solution and wring out the excess water. You want the cloth to be damp but not soaking wet. Wipe the glass in a circular motion; this helps to avoid streaks.
- Step 5: Dry the Glass: After you've cleaned the glass, it's essential to dry it thoroughly. Any remaining water can leave spots or streaks on the glass. Use a dry microfiber cloth and wipe the glass until completely dry.
- Step 6: Repeat if Necessary: If you notice that the glass is still dirty after the first cleaning round, don't worry. Sometimes, it may take a couple of rounds of cleaning to get the glass completely clean. Just repeat the steps until you're satisfied with the result.
How to Keep Your Kitchen Cabinets Longer?
Maintaining the longevity of your kitchen cabinets involves a combination of regular maintenance, careful usage, and proactive measures. Some of the strategies you can employ:
- Add Shelf Liners: Shelf liners are protective sheets you can place on the bottom of your cabinet shelves. They are a barrier between the cabinet material and the items you store. This is particularly useful for kitchen cabinets as they often house items that can leak, spill, or scratch the surface. Liners come in various materials like plastic, rubber, and fabric and can be easily removed, cleaned, or replaced when needed. They protect your cabinets and provide a clean and tidy look.
- Close Cabinet Doors and Drawers: Leaving cabinet doors and drawers open can lead to accidental impacts, scratches or dents. It also exposes the cabinet interiors to dust and dirt. You can prevent physical damage and keep your cabinets clean by closing the doors and drawers when not in use. It’s a simple habit, but it goes a long way in maintaining your cabinets.
- Use Cabinet Hardware: Cabinet hardware, like handles and knobs, allows you to open and close cabinets without touching the cabinet surface, reducing the chance of leaving smudges, stains, or scratches. They come in various styles and materials, allowing you to choose ones that match your kitchen decor.
- Avoid Moisture: Kitchens can become humid, especially when cooking. Wood cabinets can absorb this Moisture, leading to warping or swelling. To avoid this, ensure that your kitchen is well-ventilated. Using an exhaust fan or range hood can help remove excess Moisture. Also, any spills on the cabinets should be removed immediately to prevent water damage.
- Protect from Sunlight: Prolonged exposure to direct sunlight can fade the colour of your cabinets and cause the material to warp. If your kitchen gets a lot of sunlight, consider using window treatments like blinds or curtains to protect your cabinets. Alternatively, UV-protective films can be applied to your windows to block out harmful rays while still letting in natural light. Regularly rotating items on open shelves can also prevent uneven fading. This additional measure can help maintain the original look of your cabinets for a longer time.
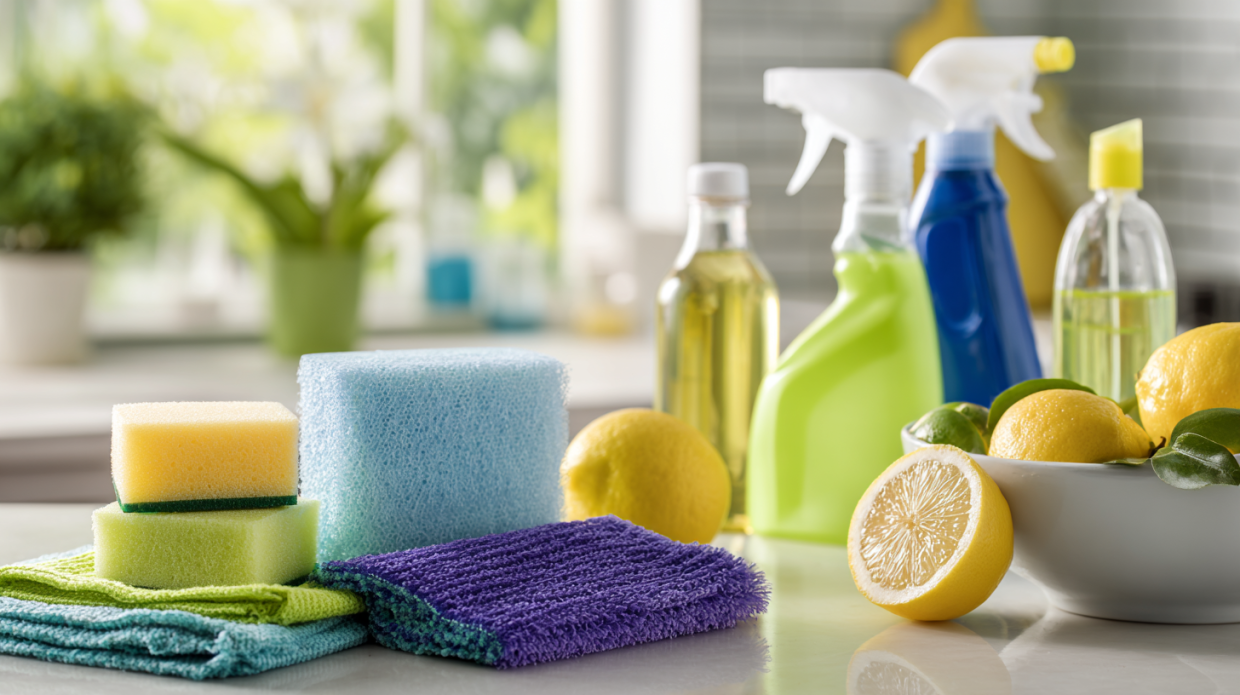
DIY Natural Cleaning Solution
If you prefer chemical-free and budget-friendly ways to maintain your kitchen cabinets, natural cleaners are a great option. They are safe, effective, and easy to prepare at home. Below are some of the DIY natural cleaning solutions to try at home:
- Vinegar & Water: Combine equal parts white vinegar and warm water for cutting through grease.
- Baking Soda Paste: Mix baking soda with a bit of water to scrub stubborn stains.
- Lemon Juice Spray: Diluted lemon juice acts as a natural deodoriser and cleaner.
- Olive Oil & Vinegar Polish: Blend olive oil with vinegar to clean and restore the shine of wooden cabinets.
- Castile Soap Solution: Adding a few drops of Castile soap to warm water works well for gentle cleaning.
Common Mistakes to Avoid in Cleaning Kitchen Units
Cleaning your kitchen units may seem simple, but small mistakes can damage finishes, reduce their lifespan, or leave them looking dull. Below are the common mistakes to avoid when cleaning the kitchen units:
- Using harsh chemicals like bleach can strip finishes and discolour surfaces.
- Excess water usage can seep into seams, causing swelling and warping, especially in wooden units.
- Skipping regular cleaning allows grease and grime to build up, making deep cleaning harder.
- Rough scrubbers can scratch surfaces and damage cabinet polish.
- Leaving moisture behind encourages mould, mildew, and surface damage.
- Cleaning without emptying cabinets leads to incomplete cleaning and leaves hidden dust or pests behind.
Get Your Home Cleaned Via NoBroker Cleaning Services
Maintaining clean kitchen cabinets is key to a healthy and pleasant home. Regular cleaning prevents pests, extends cabinet life, and improves hygiene but busy schedules make it tough. That’s where NoBroker helps, offering professional cabinet cleaning, deep cleaning, and home sanitisation. Our experts use safe methods to remove grease and stains without damage. A clean kitchen is a happy kitchen give yours the care it deserves with NoBroker today!
Frequently Asked Questions
Is it safe to use bleach on kitchen cabinets?
Should I remove the cabinet hardware before cleaning?
What is the best way to clean kitchen cabinets?
Can I use vinegar to clean kitchen cabinets?
Should I use oil-based cleaners on wooden cabinets?
Can I polish cabinets after cleaning?
How often should I deep clean my kitchen cabinets?
About the Author

Prakhar
Senior Editor
With experience of working with various up and coming startups, Prakhar has an eye for the intricate details of any subject. He is an ECE graduate and has travelled and stayed in almost all parts of India. Read his blog to get exciting details and tips from the real estate ecosystem in the world....
Recent Blogs
Subscribe to our Newsletter
Get latest news delivered straight to your inbox