Table of Contents
Loved what you read? Share it with others!
How to Clean Brass Items Simple Steps for Shine and Remove Tarnish in 2026
Updated : December 22, 2025, 11:33 PM
Author :
![]() Krishnanunni
Krishnanunni
Table of Contents
How to clean brass items? What are the necessary items to clean brass items? How often should you clean it? Brass is a beautiful material that can add a classic touch to any home. However, over time, brass can become dull and lose its shine. Household items like lemon, baking soda, vinegar, toothpaste, soap water, and even ketchup can be used for cleaning brass. It involves making natural pastes, gently scrubbing, rinsing with warm water, and drying thoroughly to prevent water stains. For optimal results, clean your brass items every 2–3 weeks if used frequently, or once a month if stored.
In this article, you’ll learn how to clean brass items safely and effectively, using everyday household items or store-bought products.
What are the Things You Will Need to Clean Brass?
Before moving ahead with the question of how to clean brass at home, you must first understand the things that you will need to clean brass. Here is how to clean brass items at home:
| Method | Best For | Key Ingredient | Quick Tip |
| Soap & Water | Lightly tarnished brass | Mild dish soap | Use warm water and a soft cloth, dry immediately to prevent water spots. |
| Lemon + Baking Soda | Medium tarnish | Lemon juice + baking soda | Make a paste, gently rub it on the brass, rinse with water, and dry thoroughly. |
| Baking Soda + Vinegar | Heavily tarnished brass | Baking soda + white vinegar | Apply paste, let sit for a few minutes, scrub gently with a soft brush. |
| Toothpaste | Small brass items or detailed engravings | Non-gel toothpaste | Apply with a soft cloth or toothbrush, rinse well, and polish with a dry cloth. |
| Ketchup | Light tarnish and for shine | Tomato ketchup | Spread a thin layer, let sit 10-15 mins, wipe off, rinse and dry. |
| Commercial Cleaners | Tough tarnish or antique brass | Brass polish solutions | Follow manufacturer instructions, always test on a small area first. |
6 Top Ways to Clean Brass
Cleaning brass ensures your decorative pieces, utensils, and fixtures stay bright and polished without damage. There are several ways of cleaning brass at home. Here are some of them on how to clean brass items easily:
1. With Soap and Water
This method is ideal for brass items that are not heavily tarnished and need light cleaning. It’s gentle, effective, and uses materials you likely already have at home. Here’s how to use this process:
Step 1: Prepare the Cleaning Solution
To prepare the brass cleaning solution, first, fill a container large enough to hold your brass item with warm water. Add a few drops of mild dish soap and stir until bubbles form on the surface.
Step 2: Clean the Brass
Dip a soft cloth or sponge into the soapy water. Then, squeeze out excess water so it’s damp but not dripping. Gently wipe the brass surface, in the intricate designs or problem areas.
Step 3: Rinse
Rinse the item under warm running water. Remove all soap residue; leftover soap can leave a film on the brass.
Step 4: Dry
Thoroughly dry the brass item with a clean, dry cloth. Ensure that all moisture is removed, especially from any crevices or intricate designs. Once the brass is dry, buff it with a second dry cloth.
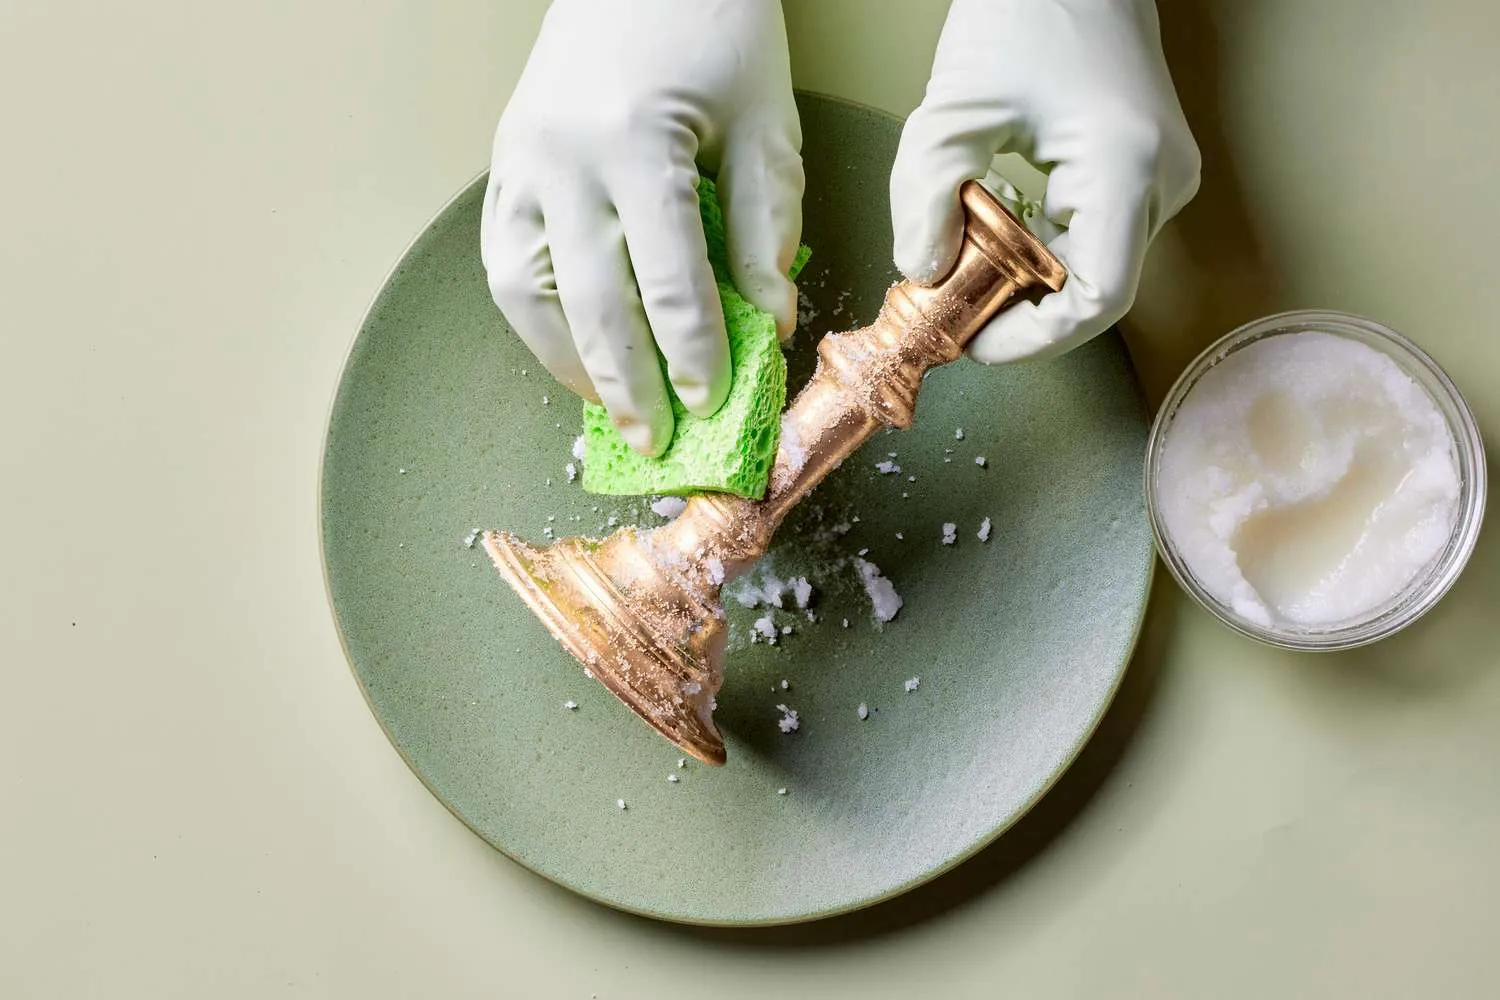
2. With Lemon and Baking Soda
Lemon and Baking Soda method leverages the natural acidity of lemon and the mild abrasive quality of baking soda, making it a potent combination for tackling stubborn tarnish on brass items. Here’s how to use this process:
Step 1: Prepare the Cleaning Paste
Combine equal parts of fresh lemon juice and baking soda in a bowl. Stir until it forms a smooth paste.
Step 2: Apply the Paste
Use a soft cloth or an old toothbrush to apply the paste to the brass item. Gently scrub the surface, ensuring the paste gets into all the nooks and crannies.
Step 3: Let it Sit
Allow the paste to sit on the brass for about 30 minutes. During this time, the citric acid in the lemon juice will react with the tarnish, helping to dissolve it, while the baking soda will provide a gentle abrasive action.
Step 4: Rinse and dry
The brass item is thoroughly under warm running water, ensuring all the paste is washed away.Once rinsed, dry the item completely using a clean, soft cloth.
3. With Baking Soda and Vinegar
Baking Soda and vinegar create a natural, non-toxic cleaning solution for brass. The vinegar’s acidity and baking soda’s mild abrasive action work together to remove tarnish without scratching the brass. Here’s how to use this method:
Step 1: Prepare the Cleaning Paste
In a bowl, combine equal parts of baking soda and white vinegar. Stir the mixture until it forms a paste. The consistency should be thick enough to adhere to the brass. If the paste is too runny, add more baking soda. If it’s too thick, add more vinegar. This paste will serve as your natural, non-toxic cleaning solution.
Step 2: Apply the Paste
Apply the paste to the brass item with a soft cloth or toothbrush. Make sure to cover all areas, especially those with heavy tarnish. Gently scrub the surface with a cloth or toothbrush.
Step 3: Let it Sit
After applying the paste, let it sit on the brass for 10-15 minutes. This allows the vinegar to react with the tarnish, helping to dissolve it.
Step 4: Rinse and Dry
Once the waiting period is over, rinse the brass item thoroughly under warm water. Ensure all the paste is removed. After rinsing, use a clean, dry cloth to dry the item.
Step 5: Inspect and Repeat if Necessary
After drying, inspect the brass item. If there’s still some tarnish left, repeat the process. Heavily tarnished items may require multiple treatments.
Step 6: Regular Maintenance
To keep your brass item looking its best, clean it regularly with this method. Regular maintenance can prevent heavy tarnish from building up.
Step 7: Storage
Store your brass items in a dry place to prevent further tarnishing. If possible, keep them in airtight bags or containers.
4. With Toothpaste
Cleaning brass with toothpaste is a simple and effective method. Toothpaste, especially the white, non-gel variety, contains mild abrasives that can help remove tarnish and build-up on brass items without damaging the metal surface. Follow this simple step-by-step process:
Step 1: Gather Your Materials
The materials you need are simple and readily available in most households. The toothpaste should be white and non-gel, as it contains mild abrasives that can help remove tarnishes. The cloth or sponge should be soft to avoid scratching the brass surface. Warm water is used to rinse the toothpaste, and a towel is needed to dry the item to prevent water spots.
Step 2: Apply Toothpaste
Squeeze a small amount onto the cloth or sponge. The amount of toothpaste needed will depend on the size of the brass item you're cleaning.
Step 3: Rub the Brass
Use the cloth or sponge to rub the toothpaste onto the brass item gently. The motion should be circular and gentle to avoid scratching the surface.
Step 4: Let it Sit
After you've applied the toothpaste, let it sit on the brass for a few minutes. This gives the mild abrasive in the toothpaste time to break down the tarnish. However, don't let it sit too long, as it could dry out and become difficult to remove.
Step 5: Rinse and Dry
Rinse the item thoroughly under warm water. This will remove all the toothpaste residue which contains the lifted tarnish. After rinsing, dry the item entirely with a clean towel. This is important as leaving the item wet could lead to water spots or even more tarnish.
Step 6: Repeat if Necessary
Repeat the process if the brass is still tarnished after the first cleaning round. Sometimes, heavy tarnishes may require multiple applications of toothpaste to thoroughly remove the blackness.
5. With Ketchup
Cleaning brass with ketchup might sound unusual, but it's a popular method due to the natural acidity of tomatoes. The acid in the ketchup removes the tarnish and brings out the brass's natural shiners. Simple process to do it:
Step 1: Apply Ketchup
Start by applying a thin layer of ketchup to the brass item. You can use a soft cloth or a sponge to spread it evenly. Ensure that the ketchup covers all the tarnished areas. The thickness of the ketchup layer doesn't need to be substantial; it is just enough to cover the surface of the brass. The ketchup acts as a mild acid, working to dissolve the tarnish.
Step 2: Let it Sit
After applying the ketchup, let it sit on the brass for about 10-15 minutes. During this time, you might notice the ketchup changing colour as it reacts with the tarnish; this is a good sign that the cleaning process is working.
Step 3: Scrub Gently
Once the ketchup has had time to sit, it's time to scrub. Use a soft cloth or a toothbrush to scrub the brass gently.
Step 4: Rinse and Dry
Rinse the brass item thoroughly under warm water after scrubbing. This step ensures that all the ketchup and the lifted tarnish are removed from the brass. Once all the ketchup is removed, dry the brass item thoroughly using a soft cloth or a towel.
Step 5: Polish (Optional)
This is the final touch. If desired, you can polish the brass with a soft cloth. This helps to enhance the natural shine of the brass and gives it a fresh, clean look.
6. With Commerical Cleaners
Cleaning brass with commercial cleaners is a common and effective method. These cleaners are specifically designed to remove tarnish and restore shine to brass items. Here’s how to use this method:
Step 1: Purchase a Commercial Cleaner
You can find these cleaners in most supermarkets, home improvement stores, or online. Some popular brands include Brasso, Bar Keeper’s Friend, and Wright’s Brass Polish.
Step 2: Read the Instructions
Each commercial Cleaner may have slightly different instructions for use. It’s essential to read these instructions thoroughly before you start.
Step 3: Apply the Cleaner
Apply a small amount of the Cleaner to a clean, soft cloth. It’s best to use a microfiber cloth or a lint-free cloth. Avoid using abrasive materials like steel wool, as they can scratch the brass.
Step 4: Rub the Cleaner on the Brass
Gently rub the Cleaner onto the brass item in a circular motion. Make sure to cover all areas, but avoid applying too much pressure, which could damage the brass.
Step 5: Let it Sit
After applying the Cleaner, let it sit on the brass for the specified time in the Cleaner’s instructions.
Step 6: Wipe Off the Cleaner
Once the Cleaner has had time to work, use a clean cloth to wipe off the Cleaner. As you wipe, you should see the tarnish coming off. You may need to repeat the process if there are stubborn spots of tarnish.
Step 7: Rinse and Dry
After you have removed all the cleaners, rinse the item with warm water. This helps to remove any remaining cleaner that could continue to react with the brass. After rinsing, dry the item thoroughly with a clean towel to prevent water spots or streaks.
Natural vs Chemical Brass Cleaning Methods
Understanding the difference between natural and chemical methods enables you to choose the most effective way to maintain your brass items. Here’s how to shine brass items safely and effectively:
| Feature | Natural Methods | Chemical Methods |
| Items required | Lemon, baking soda, vinegar, ketchup, toothpaste | Commercial brass cleaners, polishes, and chemical solutions |
| Best for | Light to medium tarnish, delicate or antique items | Heavy tarnish, stubborn stains |
| Safety | Gentle on brass, non-toxic, eco-friendly | Can be harsh, may require gloves, ventilated area |
| Ease of use | Easy, simple ingredients at home | Easy but requires careful handling and instructions |
| Shine quality | Natural shine, subtle polish | Brighter, longer-lasting shine |
| Cost | Low, inexpensive | Moderate to high |
| Time Required | Slightly longer, gentle rubbing needed | Instant results |
How Often You Should Clean Brass?
The cleaning schedule for brass items is determined by their usage and the level of environmental exposure. It’s crucial to remember that excessive cleaning of brass utensils can lead to tarnishing. It’s also essential to use suitable cleaning methods for different brass items, such as solid brass, lacquered brass, or brass-plated items, to avoid causing any damage.
- Items like door hardware or kitchen cabinet handles, which are frequently touched, should ideally be cleaned every month.
- On the other hand, decorative brass objects that aren’t handled often can be cleaned annually or whenever tarnish appears.
- Lacquered brass items with a protective finish only need to be dusted and wiped gently with a damp cloth as required.
- Moreover, it is recommended to dust and buff brass items with a microfiber cloth weekly and perform a deep cleaning every three months.
How to Keep Brass Clean and Shiny Longer?
Brass, a popular material for household items, can lose its shine with time and exposure to air and moisture. Proper care and maintenance can help keep brass clean and shiny for longer. Some necessary key steps to consider:
1. Regular Dusting
Regular dusting prevents the accumulation of dirt and grime on the brass surface. Use a soft cloth to wipe your brass items at least once a week gently.
2. Mild Soap Cleaning
Use a mild soap mixed with warm water for deeper cleaning. Apply the solution with a soft cloth, rinse thoroughly, and dry completely to prevent water spots and streaking.
3. Avoid Harsh Chemicals
Avoid using harsh chemicals or abrasive cleaners as they can damage the brass surface. Instead, opt for natural cleaners like vinegar, salt, and lemon.
4. Polishing
Use a good quality brass polish to restore shine. Always follow the instructions on the polish and remember to remove all residue after polishing.
5. Protective Coating
Consider applying a thin coat of lacquer or wax to protect the brass from air and moisture. This can help maintain the shine and prevent tarnishing.
Common Mistakes to Avoid When Learning How to Clean Brass Vessels
Brass requires gentle care to maintain its shine and durability. Here is how to clean brass vessels:
- Avoid using abrasive scrubbers, such as steel wool or rough pads, as they can scratch the brass surface permanently.
- Applying strong cleaners without testing on a small area may cause discolouration.
- Excessive use of strong acids or chemical polishes can cause brass to erode over time.
- Leaving moisture on vessels after cleaning can lead to tarnish or green spots.
- Combining vinegar, baking soda, and commercial cleaners can harm the finish.
- Ignoring regular maintenance turns the brass completely black, making cleaning harder and less effective.
- Keeping cleaned brass in humid places increases tarnishing.
Book Your Home Cleaning Services Via NoBroker
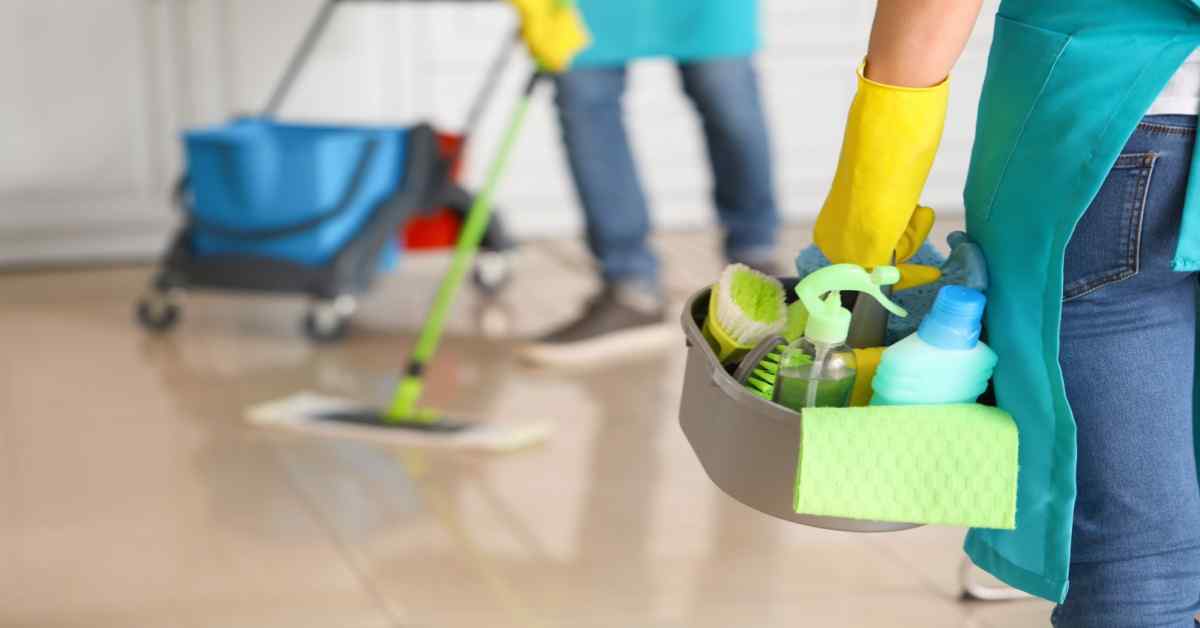
Maintaining the shine and lustre of your brass items doesn’t have to be difficult. With the proper knowledge and a little effort, you can keep your brass items looking as good as new. And if you are still unsure about how to clean brass items, consider seeking professional services for home maintenance with a trusted service provider like NoBroker.
NoBroker excels in offering a range of home services. This includes deep cleaning services, where professional cleaners thoroughly clean every nook and cranny of your home, ensuring that everything, including your cherished brass items, is pristine. So, if you’re seeking a platform that helps you maintain a house's beauty, NoBroker is the way to go. Visit our website today to learn more about their offerings.
Frequently Asked Questions
Ans: The best way to clean brass is to mix equal parts vinegar and water, then gently scrub the brass with a soft cloth.
Ans: Yes, lemon juice mixed with baking soda forms a natural brass cleaner; rub it onto the brass and then rinse.
Ans: Make a paste of salt, vinegar, and flour, apply it to the tarnished areas, let it sit for an hour, then rinse and polish.
Ans: Yes, the acidity in ketchup can help remove tarnish from brass items; apply, let sit for a few minutes, then rinse and dry.
Ans: Yes, commercial brass cleaners are available and can be effective; follow the manufacturer's instructions for best results.
Ans: Use natural methods like lemon with baking soda or vinegar with salt.
Ans: It is advised to clean brass vessels every 2–3 weeks for regular use.
Ans: No, avoid chemical polishes for food-use vessels.
Recommended Reading

Deep Clean Your Washing Machine: Step-by-Step Guide & Tips
January 31, 2025
21750+ views
Top 10 Plumbing Service Apps in 2026
January 31, 2025
17006+ views
How to Remove Rust from Iron: Step-by-Step Guide for Restoring Your Iron Items in 2026
January 31, 2025
7501+ views
How to Clean Brass Items Simple Steps for Shine and Remove Tarnish in 2026
January 31, 2025
6969+ views

12 Budget-Friendly Home Organisation Ideas
January 31, 2025
5405+ views
NoBroker Easy Cleaning Tips Testimonials
Most Viewed Articles
List of the Best Home Cleaning Apps: Book Home Cleaning Services for Daily and Deep Cleaning
January 31, 2025
27452+ views
Deep Clean Your Washing Machine: Step-by-Step Guide & Tips
January 31, 2025
21750+ views
How to Get Rid of Bathroom Flies: 8 Quick Methods
January 31, 2025
21102+ views

Top 10 Tile Cleaner Liquids with Prices in India for 2026
February 23, 2025
19700+ views
Diwali Cleaning Tips and Guide: Make Your Home Shine for the Festival in 2026
January 31, 2025
18306+ views
 Author
Loved what you read? Share it with others!
Recent blogs in
Move-In vs Move-Out Cleaning: Key Differences & Complete Checklist in 2026
March 9, 2026 by Krishnanunni H M
Bathroom Steam Cleaning: Process, Benefits, and Professional Tips in 2026
March 9, 2026 by Priyanka Saha


 Full RM + FRM support

Join the conversation!