Are your plans to update your home décor on hold because of the current pandemic situation? Don’t worry about it because we’ve got you covered. Listed below are a few home decor ideas that you can do at home. With something simple as home dyed napkins, tea light lampshades printed dresser; your whole space can feel renovated, modern, but timeless, and polished. You can try each of these home décor ideas in a day and be one step closer to creating the interior space of your dreams.
DIY Home Décor Ideas to Spruce your Space
Here, we give home décor tips to help you master the art of beautifying and putting your creativity to the test. Click some of the DIY home decor ideas below.
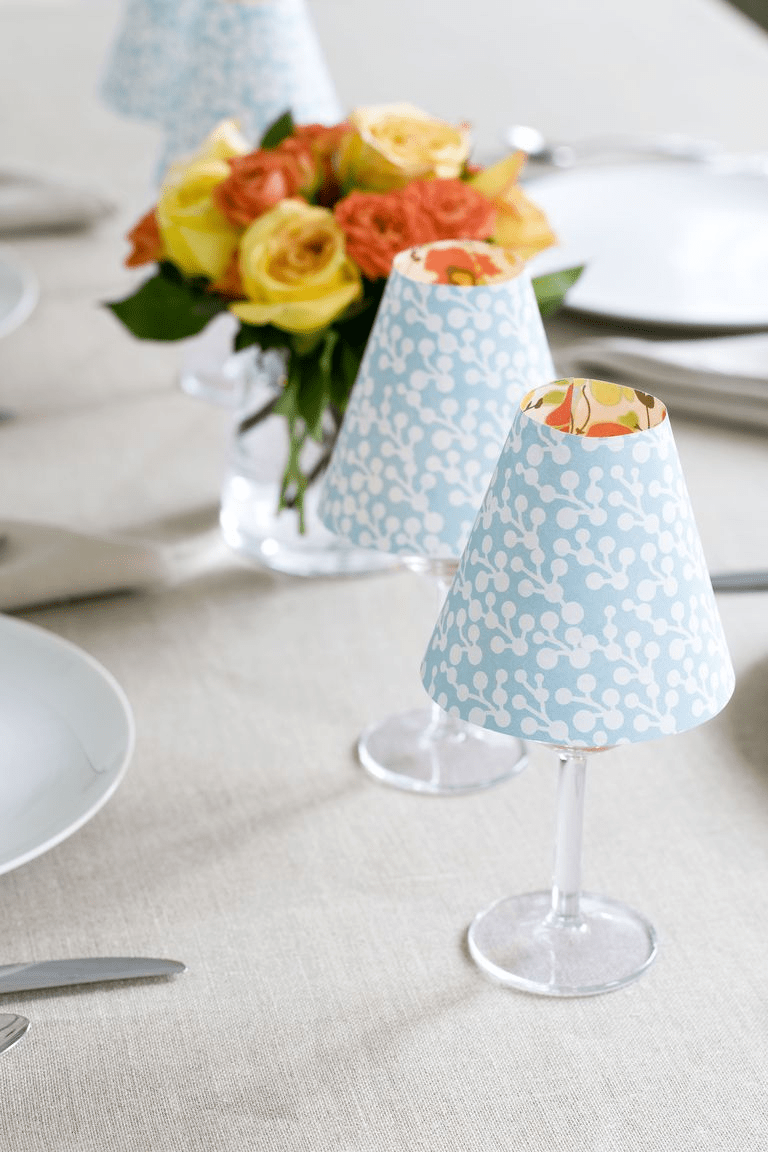
1. LED Lampshades
Do you wish to kick the traditional look of your dining table up a notch with few unique lamps? These DIY home decor lamp shades can allow your table to go from dull to upbeat. All you need is a LED light, wineglass, and a paper shade to create this amazing design that’s complementary to the table and just-wow-the guests.
Required Materials:
- Wineglasses
- LED tea light candles
- Tape
- Scissors
- Scrapbook paper
- Lampshade template
- Glue pen
Step 1: Trace the sheet of scrapbook paper according to the template.
Step 2: Stick glue from the top to the end of the template. Fold the glued ends to form the design of the lampshade.
Step 3: Place the LED tea lights inside each wine glass.
Step 4: Set the lampshade on your dining table, however, it is OK to use it on your bed tables, too.
 Source: Becky Vega
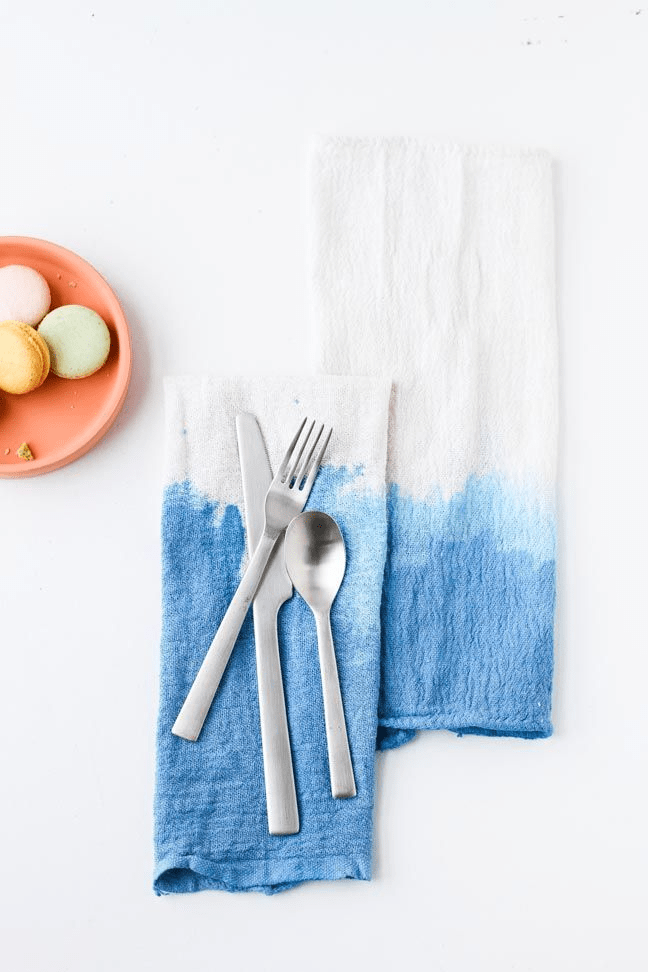
2. Hand-Dyed Napkins
Give home decor items like your plain, white linens a makeover with a tie-dye effect. The ombre hues look best on napkins, but you are welcome to extend the idea on placemats too. These DIY home decor ideas can also serve as a unique gift for your mom on Mother’s Day. The steps are pretty simple to create one, so here goes.
Required Materials:
- Cotton cloth
- Bowl
- Fabric paint
- Paint brush
- Tablespoon
Step 1: Dip a cotton cloth in a bowl of water or place it under a running tap. Squeeze out the excess water and lay it over a clean, flat surface.
Step 2: Start working from the bottom by faintly stroking with fabric paint. Sprinkle a few drops of water preferably with a tablespoon. Mix the paint as you move towards the top.
Step 3: Hang outside to dry for a few hours or overnight. After the cloth dries, iron it to set the paint.
Step 4: Set the ombre cloth on your dining table for a delightful spread. You may use this as napkins or placemats.
 Source: Paper and Stitch
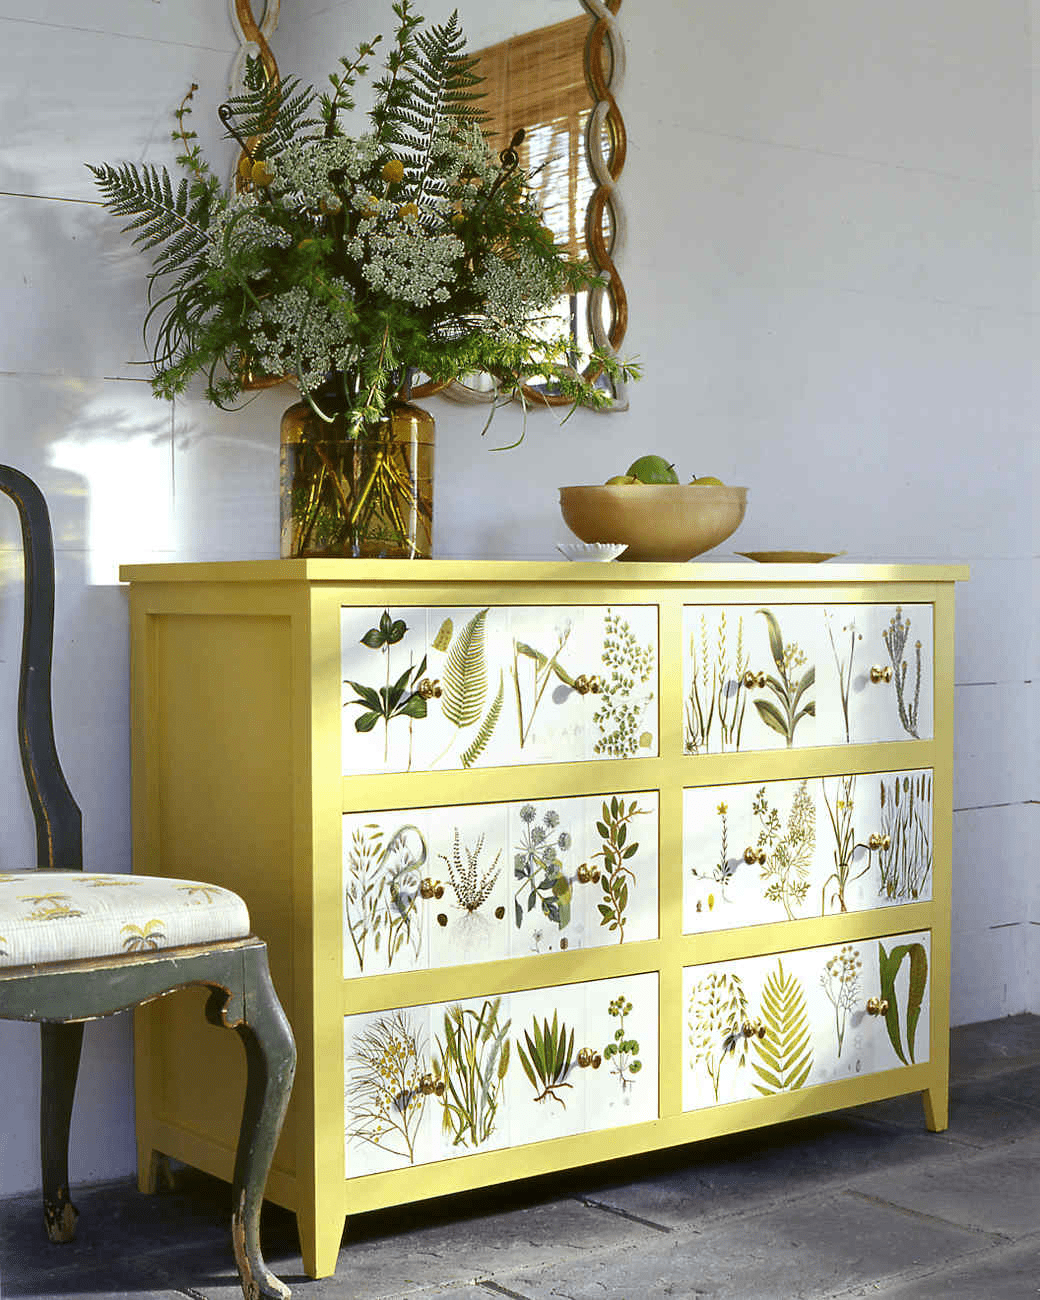
3. Printed Dresser
When you look at your space, does it look tidy but plain? In this case, you need something cozy and opulent for your home decor. Transform your antique pieces like a dresser with fresh fabric to add a bit of variety to your home décor. When we say printed fabric, we mean luscious texture for the room. Adding the prints can give a fresh pop of youthfulness on those old home decor items, so let’s start.
Required Materials:
- Wallpapers or blueprint photocopy
- Mod podge
- Foam brushes
Step 1: Cut the wallpaper or printed photo after you take measurements of the drawer. You may try with leftover materials to get the desired size and shape.
Step 2: Once you have the samples ready, attach the wallpaper using the mod podge or glue. Smooth out towards the top and ends as required to avoid wrinkles from forming.
Step 3: Finish by painting the frame in high-shine color.
 Source: marthastewart
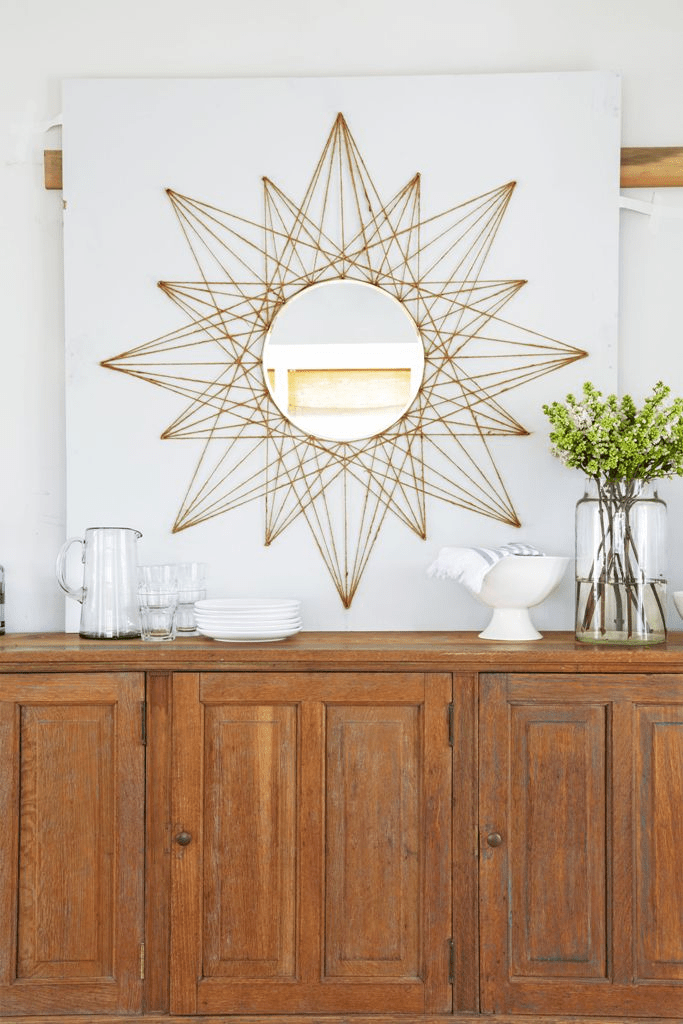
4. Star Mirror
The home decor in India commonly gravitates towards wall hangings like photo frames and paintings for home décor. Why not diversify your choices of your comfort zone? We recommend this eye-catching star mirror to make it look like you drew it from your style. And it looks expensive too. Follow these quick and simple steps below to give your home décor a new feel.
Required Materials:
- Round Mirror (14 inches)
- Nails
- Jute Twine Rope (One Spool)
- Masking tape
- Yardstick
Step 1:
Place the mirror on the wall where you wish to hang. Measure the border of the mirror using a pencil and draw the center. Break up the round figure into 16 sections while marking each point. Mark each point with a different set of numbers (for instance, 1-16) moving in a circular direction.
Step 2:
Starting from the first point, measure an upright line of 16 inches. You may use a yardstick for better guidance. Mark the ends. Next, start from the second point. Follow the same steps but create a line of 12 inches. Mark and move on the next. Repeat the steps for each circular point, replacing the 16 and 12 inches lines. Mark the border areas using numeric figures like 17-32. Mark 17 towards the top and slowly work the other numbers in a clockwise direction. Seal all the points using the nails.
Step 3:
Bind the jute twine rope around the nails. Start with a knot at the first nail and end with a knot after snipping off the twine from the last nail. Next, begin from nail 25 wrapping the twine around the nails Repeat the same steps for nail 26 and 27. You may alternate between the different numerical figures while wrapping each jute twine.
Step 4:
Then, begin from nail 25 and encircle the twine rope around the nails exchanging between the outer and inner nails. Move-in a clockwise direction as you do until you reach number 25. Do not cut off the twine, instead, leave out nail number nine and encircle twine around nails 10, 11, 26, and 27. Continue in the same pattern until you finish at number 10. Lastly, move in a clockwise direction while wrapping the twine around the inner rim of the nails until it meets at 9.
Step 5:
Take two hanging strips and stick it at the back. Glue the mirror to your favorite wall corner. Watch how these DIY home decor ideas make your space feel brighter and larger.
 Source: thewowodecor
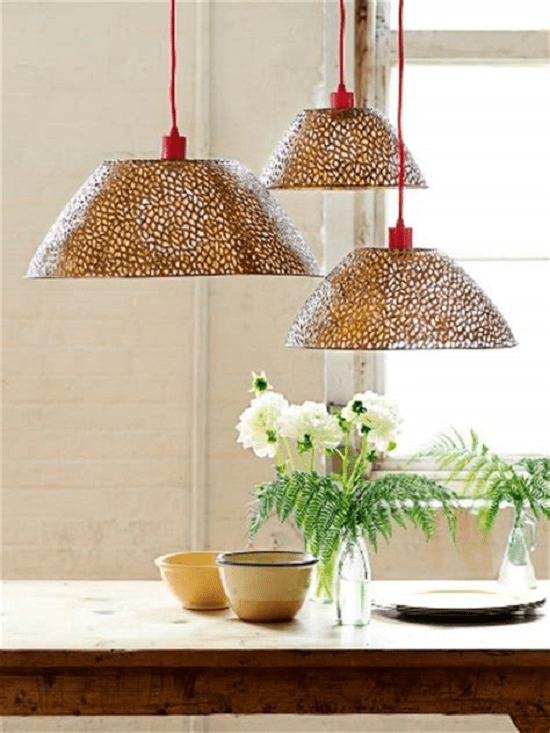
5. Nesting Bowl Lights
If there’s something that can illuminate a space or a dining table single-handedly, it’s the lighting fixture. Best instance? These nesting bowl lights. It instantly adds sophistication to any corner of the room. If you are looking for home decor ideas that don’t take time, then this is perfect.
Required Materials:
- Nesting bowl sets
- Tinner’s snips
- Nylon cord
- Clear bulb
Step 1: Use the tinner’s snips to punch a hole in the bottom of the bowl. Make sure that the hole is enough for the nylon cord to easily pass through.
Step 2: Slide the cord end into the hole. Tighten the ring attachment on the other end to secure.
Step 3: Attach the bulb to the other end of the cord. Join to a power supply and decorate.
 Source: Brightstuffs.com
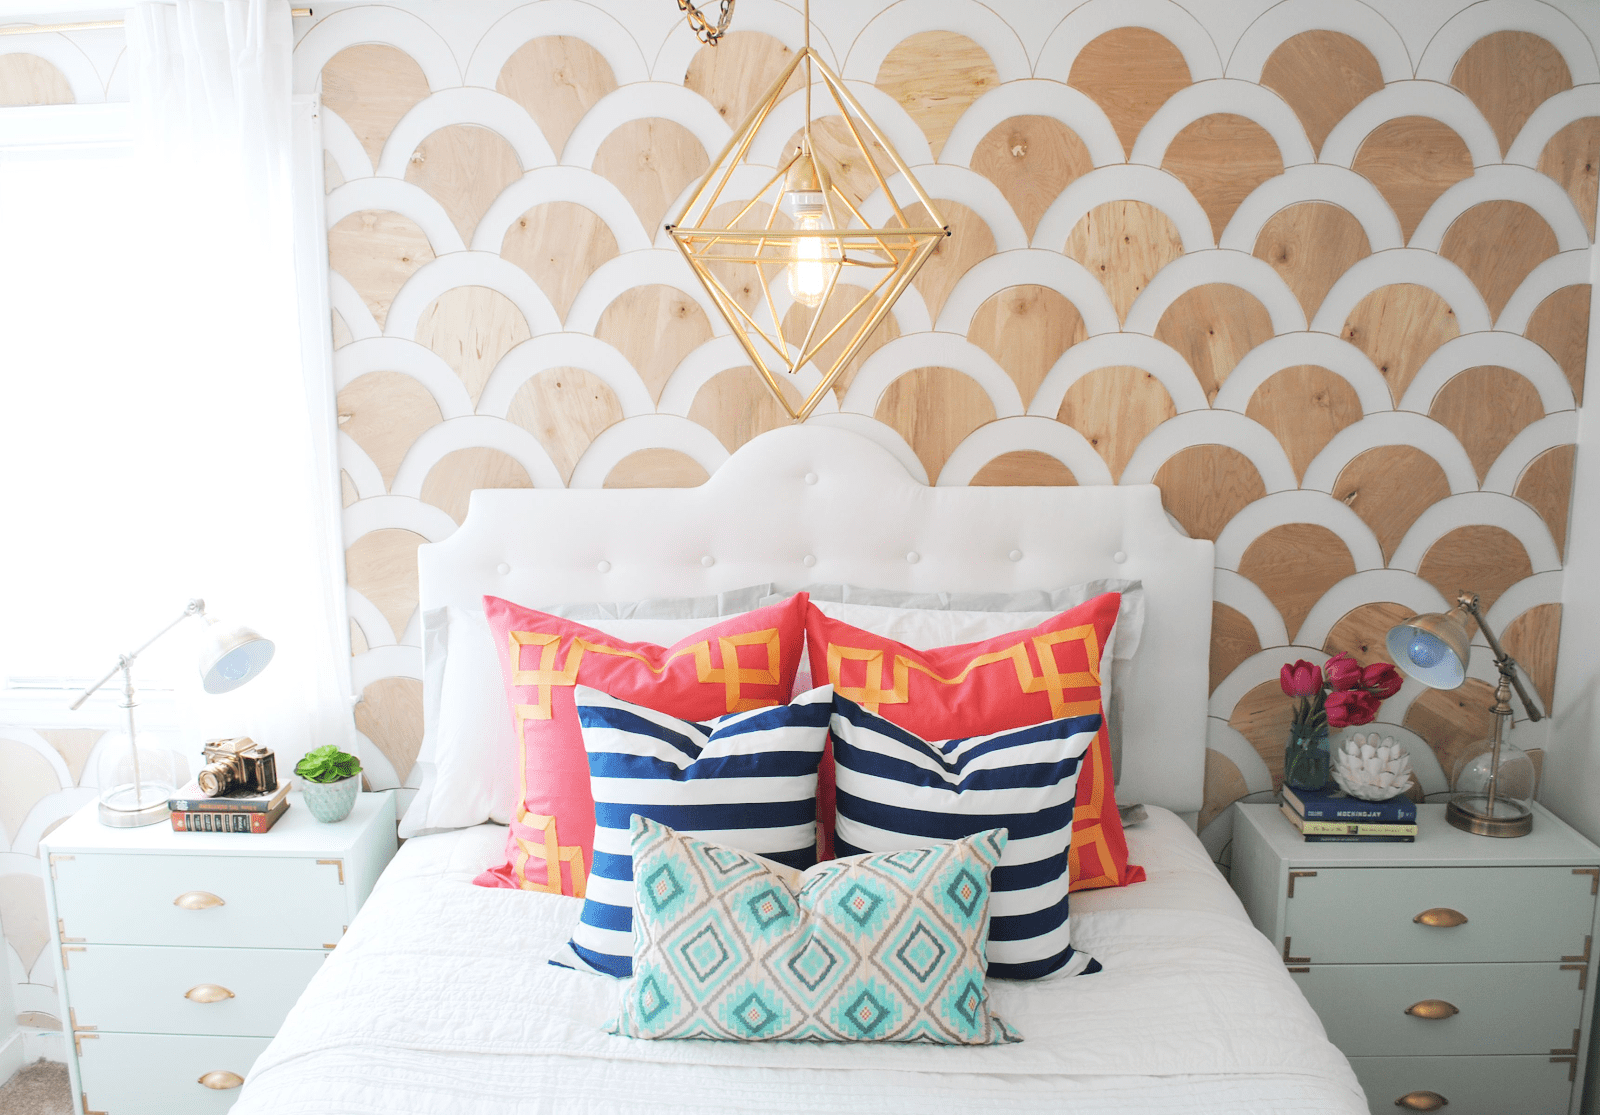
6. Scalloped Wall
For an additional layer of glam and unexpected finish of style, we suggest creating a home decor wallpaper design for the bedroom. And it is quite feasible to create this one. Rather than browsing for traditional ideas of home decor in India like wallpaper patterns which date a room rapidly-we suggest doing a simple statement wall that doesn’t change out seasonally.
Required Materials:
- Cardboard or stencil paper
- Ink pen
- Scissors
- Sharpie pen
- Double coated tape
- Sandpaper
Step 1:
Take a thick cardboard and cut it out into two different scallop sizes. Measure the circumference of the smaller size with the help of 1/8 plywood. Trim off the edges using an industrial scissor. Continue the steps until you get the desired scallop shapes to cover the wall.
Step 2:
Next, draw the arch of the larger sized scallop onto the wall using a sharpie pen. Connect the arches as you continue on the sides. Make a second row underneath the first, allowing them to stagger between the arch of the first row. Repeat until the wall is filled. Next, outline the entire line of the smaller scallop inside the larger ones.
Step 3:
Use the sandpaper to smoothen out the rough edges of the scallop cutouts. Set strips of the double-sided tape to attach the scallop firmly. Assemble with the smaller designs and connect. Your DIY home decor wallpaper is ready.
 Source: Christina Jones
Our home decor tips are simple and will give your home the desired personal touch. We hope you loved them. Write in to us and share your experiences in the comment section below or click below.

Most Viewed Articles
NoBroker.com is a disruptive real-estate platform that makes it possible to buy/sell/rent a house without paying any brokerage.
Following are service along with Rent / Sell / Buy of Properties
- Rental Agreement
- Packers And Movers
- Click And Earn
- Life Score
- Rent Receipts
- NoBroker for NRIs
Loved what you read? Share it with others!


 ✕
✕


 Full RM + FRM support