How to Clean Mould:Clean Mould from Bathrooms and Tiles
Easy Cleaning Tips
9.9K Views
Table of Contents
Summary
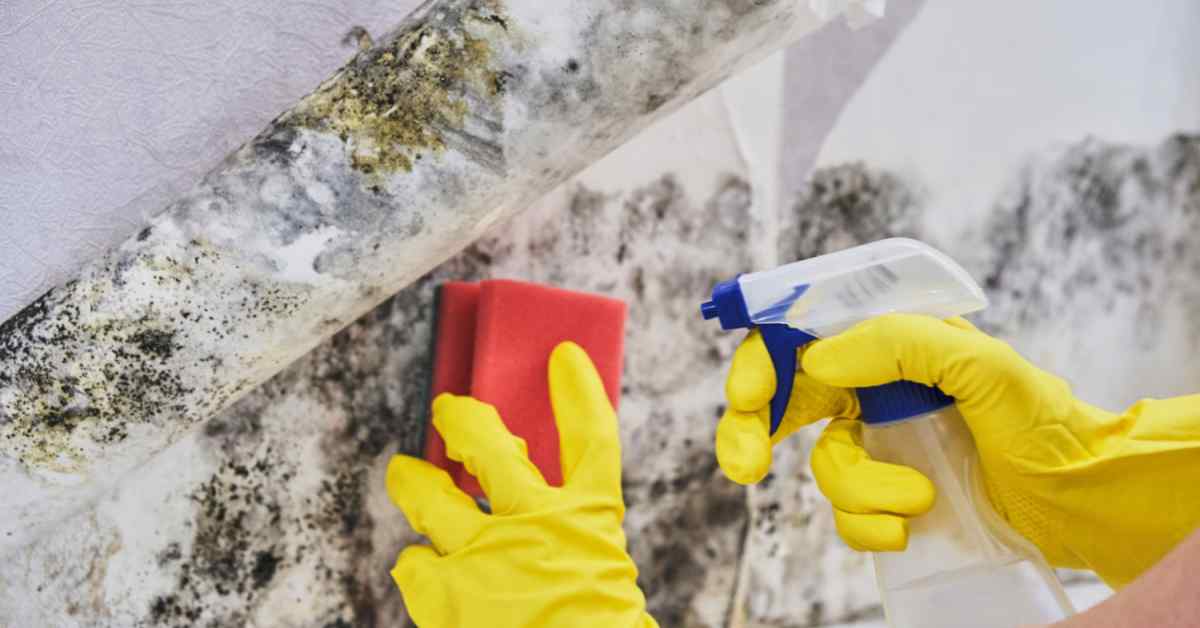
Dealing with mould infestations is a common challenge in many households. However, knowing exactly how to clean mould is essential for maintaining a healthy living environment. Mould not only affects the aesthetics of your space but can also pose serious health risks to you and your family. In this comprehensive guide, we will take you through the steps and strategies necessary to effectively combat mould.
Best 8 Mould Remover for Walls (2025)
The following table provides a detailed comparison of popular mould and mildew removers available in India, highlighting their types, key features, and current prices:
Recommended Reading
List of the Best Home Cleaning Apps: Boo...
31K Views

Top 10 Best Robot Vacuum Cleaner in Indi...
18.7K Views

Diwali Cleaning Tips and Guide: Make You...
18.4K Views

Top 30 Cleaning Tools You Need for a Spo...
11.4K Views

How to Keep Your Home Dust-Free: Best Cl...
11.3K Views
| Product Name | Type | Key Features | Price (₹) |
| Cif Perfect Finish Mould Stain Remover Spray | Spray | Bleach-based formula, removes tough mould and mildew stains quickly, suitable for walls and tiles | ₹244.30 |
| Astonish Extra Strength Mould & Mildew Blaster Spray | Spray | Chlorine-free, powerful cleaning, gentle on paint, leaves fresh scent | ₹349 |
| RDIYORA Powerful Mold Remover Spray | Spray | Fast action, easy to use, affordable option for home walls | ₹179 |
| Cleno Mold & Mildew Cleaner Spray | Spray | Mild cleaner for regular maintenance, safe for painted surfaces | ₹275 |
| Dettol Mould & Mildew Remover Spray | Spray | Trusted hygiene brand, disinfects and removes mould effectively | ₹1,999 |
| 90 g Mold Remover Gel | Gel | Clings to vertical surfaces, deep cleans grout and wall joints | ₹1,199 |
| Searegal Mildew Stain Remover Gel | Gel | Thick gel consistency, ideal for persistent mould spots | ₹290 |
| Cheferyn Magic Mold Remover Gel | Gel | Works well on walls and tiles, easy to apply, budget-friendly | ₹206 |
Natural vs Chemical Remedies
The table below provides a side-by-side comparison of chemical and natural remedies for cleaning mould and mould treatment for walls, highlighting key parameters such as effectiveness, safety, cost, and application methods:
| Parameters | Chemical Remedies | Natural Remedies |
| Common Types | Spray, Gel | Vinegar, Baking Soda, Tea Tree Oil, Hydrogen Peroxide |
| Application Method | Spray on the surface, wait a few minutes, wipe or scrub; Gel clings to vertical surfaces | Spray, scrub, or apply paste; some need a waiting time |
| Effectiveness | High to very high | Moderate to high |
| Safety | Can be harsh on skin, paint, and surfaces; strong chemical smell | Non-toxic, eco-friendly, safe for kids and pets |
| Cost / Affordability | Moderate to expensive | Low-cost, inexpensive |
| Surface Suitability | Walls, tiles, grout, bathrooms; gels good for vertical surfaces | Walls, tiles, and grout may require repeated application |
| Pros | Fast-acting, deep cleaning, disinfects | Safe, natural antifungal, prevents regrowth, environmentally friendly |
| Cons | Harsh chemicals, strong odour, potential staining, and needs caution | Less effective on tough mould, may require multiple applications, strong smell (vinegar) |
Natural Mould Cleaner
Bye-Bye Mould! Discover the Power of Natural Mould Cleaner. Say goodbye to mould and learn how to get rid of fungus on walls the eco-friendly way!
In the world of household cleaning, the trend is shifting towards natural solutions that are safe for both residents and the environment. When it comes to mould eradication, nature offers a plethora of effective agents that can do the job without exposing you or your family to harsh chemicals. These natural remedies not only present a safer cleaning alternative but also come with a range of benefits that might surprise you.
Benefits of Using Natural Agents
1. Environmental Benefits
Natural mould cleaners are eco-friendly. Unlike many commercial cleaners, they don't contain harmful chemicals that can seep into the soil or waterways. By choosing natural agents, you're reducing your ecological footprint and promoting a cleaner, greener planet.
2. Health Benefits
Many commercial mould removers come with warning labels indicating risks to human health. On the other hand, natural cleaning agents, in most instances, are free from toxic ingredients. This means fewer fumes to inhale and a reduced risk of skin irritations or allergic reactions.
3. Cost-Effectiveness
Many natural mould cleaning solutions can be sourced from regular household items, saving you a trip to the store and some money. Not to mention, these agents often serve multiple cleaning purposes, so you're getting more bang for your buck.
Common Natural Cleaning Agents
1. White Vinegar
A staple in most pantries, white vinegar is acidic, which makes it effective in killing mould. It's safe for most surfaces and doesn't leave a residue.
2. Hydrogen Peroxide
This antifungal and antibacterial agent is great for removing mould. It can be used in combination with other natural cleaners or on its own.
3. Baking Soda
Mildly abrasive and alkaline, baking soda not only kills mould but also prevents its return. It's gentle, so it won't damage most surfaces.
4. Essential Oils
Tea tree oil, in particular, is renowned for its antifungal properties. A few drops combined with water can create a potent mould cleaner.
Step-by-step Guide to Using Each Agent
1. White Vinegar
- Pour undiluted white vinegar into a spray bottle.
- Spray generously on the mouldy area.
- Allow it to sit for an hour.
- Wipe and rinse the area with water. Allow it to dry thoroughly.
2. Hydrogen Peroxide
- Pour 3% concentration hydrogen peroxide into a spray bottle.
- Spray on mould and wait for at least 10 minutes.
- Scrub the area to remove all mould and mould stains.
- Wipe the area clean.
3. Baking Soda
- Add a quarter tablespoon of baking soda to a spray bottle of water.
- Shake until baking soda dissolves completely.
- Spray the solution on mouldy surfaces.
- Scrub away mould and rinse with water. Spray again and let it dry to prevent future mould growth.
4. Tea Tree Oil
- Combine about ten drops of tea tree oil with water in a spray bottle.
- Shake to mix well.
- Spray the solution on the mould and don't rinse. The strong scent will dissipate, leaving the area mould-free.
**Remember to always do a patch test on a small area before using any cleaning agent to ensure it doesn't damage or discolour the surface.**
How to Remove Mould from Walls Outside the House?

Exterior mould not only tarnishes the beauty of your home, but it also poses potential health risks and structural damage. Understanding the implications and how to tackle them effectively is crucial.
Why Exterior Mould is a Concern?
Mould thrives in damp environments. When black mould on outside of house establishes its presence, it can gradually degrade surfaces and potentially enter the interior. Beyond aesthetic concerns, mould can be harmful, leading to potential allergic reactions and respiratory issues for those exposed.
Common Exterior Areas Prone to Mould
- Gutters and Downspouts: These often collect organic matter, providing a ripe environment for mould.
- Siding and Walls: Especially the sides that don’t receive direct sunlight and remain damp.
- Decks, Patios, and Porches: Wood, concrete, and even stone can harbor mould if they remain moist.
- Roof Shingles: Particularly in shaded areas or parts frequently exposed to damp conditions. While bleach solution is a common method for roof mould removal, consider using a fungicide for a longer-lasting solution.
- Foundation and Basement Entrances: Where water may pool or humidity levels are high.
Tools and Materials Needed
- Soft-bristle brush or scrub brush
- Garden hose with a nozzle or pressure washer (use with caution)
- Bucket
- Protective gloves and eyewear
- Mild detergent or specialised mould removal cleaner
Cleaning Black Mould with Bleach & Other Cleaning Agents on Exterior Surfaces
For black mould removal use bleach as a potent mould-killer, and using it outdoors requires caution. It can harm plants and alter the colour of some surfaces. Mix one part bleach to ten parts water for a safe solution. Scrub affected areas with the solution and rinse thoroughly with water. Alternatively, there are eco-friendly commercial mould removers available that are safe for outdoor use. To clean mildew off wood, try a gentle solution of dish soap and water or a vinegar and water mix.
Precautionary Measures
- Protect Plants: Cover plants or wet them with water to minimise bleach damage.
- Safety First: Always wear protective gloves and eyewear when dealing with cleaning agents.
- Avoid Harsh Pressure: If using a pressure washer, start with a low setting to prevent damage to surfaces.
- Test a Small Area: Before cleaning, test your solution on a small, inconspicuous area to check for any adverse reactions or discolouration.
- Regular Maintenance: Regularly cleaning and checking potential mould hotspots can prevent large-scale problems in the future.
Removing Mould from Interior Walls

Importance of Addressing Mould on Walls
Cleaning mould off walls isn’t just unsightly; it’s a clear sign of deeper moisture and health concerns. Left untreated, mould can lead to respiratory issues, trigger allergies, and deteriorate the structural integrity of your home. For extensive mould problems, consider consulting a professional mould removal service for a safe and thorough solution.
Signs and Symptoms of Mould on Walls
- Visible dark spots or patches that can range in colour from black to green.
- A musty odor emanating from specific areas of the wall.
- Wall surfaces that feel damp to touch.
- Peeling or bubbling paint or wallpaper.
- Exacerbated respiratory issues or allergies when inside the home.
Necessary Tools and Materials
- Gloves
- Safety goggles
- A face mask
- Soft scrub brush
- Spray bottle
- Mild detergent or specialised mould cleaner
- Clean cloth or sponge
- Bucket and water
A Step-by-Step Guide: How to Get Rid of Mould on Walls Permanently?
Pre-Cleaning Steps:
- Ensure the room is well-ventilated. Open windows and, if possible, use a fan.
- Put on safety gear, including gloves, safety goggles, and a face mask.
- Prepare a cleaning solution by filling a spray bottle with either a mix of water and mild detergent or a specialised mould cleaning solution.
Cleaning:
- Spray the affected wall area generously with the cleaning solution.
- Allow the solution to sit for 5-10 minutes to loosen the mould.
- Gently scrub the mouldy surface with the scrub brush in a circular motion. Ensure not to scrub too hard as it can damage the paint or wall surface.
- Wipe away the loosened mould and cleaning solution with a clean cloth or sponge.
- Repeat the process if necessary until the mould is completely removed.
Post-Cleaning Steps:
- Rinse the cleaned area with fresh water using a clean cloth or sponge.
- Dry the area thoroughly using a dry cloth or towel. Ensure no moisture remains to prevent mould regrowth.
- Regularly check the area for any signs of mould recurrence and ensure that the root cause of moisture is addressed.
- Regular maintenance and vigilance can prevent the recurrence of mould, safeguarding your home and the health of its occupants.
Removing Mould From Tile and Grout

Why Tiles and Grout are Mould-Prone Areas
Tiles and grout in bathrooms, kitchens, and other moisture-prone areas are notorious breeding grounds for mould. The combination of humidity, warmth, and porous surfaces provides the perfect environment for mould to thrive.
Necessary Tools and Materials:
- Rubber gloves
- Safety goggles
- A face mask
- Soft-bristle brush or an old toothbrush
- Spray bottle
- White vinegar or hydrogen peroxide
- Baking soda
- Water
- Clean cloth or sponge
- Grout sealer (optional)
Step-by-Step Cleaning Guide
1. Safety First
Put on your rubber gloves, safety goggles, and a face mask to protect yourself from mould spores and cleaning agents.
2. Prepare the Cleaning Solution
In a spray bottle, mix either white vinegar or hydrogen peroxide with an equal amount of water. These solutions are effective against mould and mildew.
3. Pre-Clean
Before applying the cleaning solution, remove loose debris and dirt from the tile and grout using a soft-bristle brush or an old toothbrush.
4. Apply the Cleaning Solution
Liberally spray the affected tile and grout with the cleaning solution. Ensure that the entire mould-infested area is well-covered.
5. Scrub Gently
Using the soft-bristle brush or toothbrush, scrub the mouldy areas in a circular motion. Take care not to scrub too hard to avoid damaging the tile or grout.
6. Rinse and Repeat
Rinse the cleaned area with clean water, using a clean cloth or sponge to wipe away the cleaning solution and mould residue. If mould remains, repeat the process until the tiles and grout are mould-free.
7. Precautions to Take When Cleaning Tiles and Grout
Ensure proper ventilation by opening windows and doors to minimise exposure to cleaning fumes.
Avoid using abrasive materials or harsh chemicals that may scratch or damage the tiles and grout.
Do not mix cleaning agents, as this can create dangerous fumes. If the mould problem persists or if the grout is severely damaged, consider consulting a professional.
8. Seal the Grout (Optional)
Once the grout is clean and dry, you may choose to apply a grout sealer to prevent future mould growth. Follow the manufacturer's instructions for application.
By following these steps and taking necessary precautions, you can effectively remove mould from your tiles and grout, restoring the cleanliness and hygiene of your living spaces. Regular maintenance and prompt cleaning can help prevent mould from returning.
Removing Mould from Household Appliances

Household appliances, although designed to make our lives easier, can sometimes become breeding grounds for mould. Let's explore how to tackle mould in some common appliances and keep them clean and safe.
Appliances Commonly Affected by Mould
- Refrigerators: Refrigerators are susceptible to mould growth, particularly in drip trays, gaskets, and on forgotten leftovers. The cool, damp environment inside the fridge can promote mould development.
- Washing Machines: Front-loading washing machines, in particular, are prone to mould buildup. The rubber gasket around the door and detergent compartments can trap moisture and detergent residues, creating an ideal environment for mould.
- Coffee Makers: The moist interiors of coffee makers can harbor mould and mildew. This is often overlooked but important for maintaining the cleanliness of the appliance and the quality of your brew.
Step-by-Step Cleaning Guide for Each Appliance
1. Refrigerators
- Empty the Fridge: Start by removing all the items from the refrigerator. Place perishables in a cooler with ice packs to keep them fresh.
- Unplug and Defrost (If Necessary): If you see ice buildup or frost, unplug the fridge and let it defrost. Mould can hide in these areas.
- Clean Removable Parts: Remove shelves, drawers, and other removable parts. Wash them with warm, soapy water and dry thoroughly.
- Clean the Interior: Mix a solution of equal parts water and white vinegar. Use this to wipe down the interior, including the walls, shelves, and gaskets. Pay special attention to any visible mould.
- Clean the Drip Tray: The drip tray under the fridge can collect water and mould. Remove and clean it with soapy water.
- Return Items and Plug In: Once everything is clean and dry, return the items to the fridge, and plug it back in.
2. Washing Machines
- Empty the Drum: Ensure the washing machine drum is empty. Remove any clothes or laundry items.
- Inspect the Gasket: Check the rubber gasket around the door for mould or mildew. If you find any, use a damp cloth and a mixture of water and vinegar to clean it.
- Clean the Detergent Tray: Remove the detergent tray and wash it thoroughly with warm, soapy water. Rinse and dry before placing it back.
- Run a Cleaning Cycle: For front-loading machines, run a cleaning cycle with hot water and a cup of white vinegar. This helps to disinfect and remove mould from hidden areas.
3. Coffee Makers
- Empty the Reservoir: Ensure there is no water left in the reservoir. Discard any used coffee grounds.
- Clean Removable Parts: Remove and clean all removable parts like the carafe, filter basket, and any other components that come into contact with coffee.
- Vinegar Solution: Fill the coffee maker's water reservoir with a mixture of equal parts white vinegar and water.
- Run a Brew Cycle: Start a brew cycle without coffee grounds. The vinegar solution will clean the internal components and remove any mould or mineral deposits.
- Rinse Thoroughly: After the cycle is complete, rinse the coffee maker by running plain water through it for a few cycles until the vinegar smell is gone.
Regularly cleaning and maintaining these household appliances can help prevent mould growth and ensure they continue to function efficiently.
How to Prevent Mould?
Mould prevention is a critical aspect of maintaining a healthy and clean living environment. By taking proactive measures, you can keep mould at bay and safeguard your home and health. Let's explore the importance of mould prevention and the steps you can take.
Importance of Mould Prevention
- Health Benefits: Preventing mould is crucial for your health. Mould can release spores and mycotoxins that, when inhaled, can lead to respiratory issues, allergies, and other health problems.
- Property Preservation: Mould can cause structural damage to your home, leading to costly repairs. By preventing mould, you protect the integrity and value of your property.
- Peace of Mind: Knowing that your living space is mould-free provides peace of mind and a comfortable living environment for you and your family.
Measures to Take Immediately After Spotting Mould
- Isolate the Area: If you spot mould in a specific area, isolate it to prevent further contamination. Close doors and seal off the affected space if possible.
- Address the Source of Moisture: Mould thrives in damp environments. Identify and eliminate the source of moisture that is promoting mould growth. This could be a leaky pipe, roof, or poor ventilation.
- Wear Protective Gear: Before attempting to clean mould, ensure you wear appropriate protective gear, including gloves, goggles, and a face mask.
- Proper Cleaning: Use suitable cleaning agents and follow the recommended cleaning guidelines to remove the mould safely and effectively. Refer to the previous sections for specific cleaning instructions.
Routine Checks and Maintenance Tips
- Regular Inspections: Perform routine inspections of your home, especially in areas prone to moisture, such as basements, bathrooms, and kitchens. Look for signs of mould or dampness.
- Monitor Humidity Levels: Keep an eye on indoor humidity levels. Invest in a hygrometer to measure humidity, and if it consistently exceeds 50%, consider using a dehumidifier to reduce moisture.
- Ventilation: Ensure proper ventilation in areas like bathrooms, kitchens, and laundry rooms. Use exhaust fans, open windows, and keep air circulating to reduce humidity.
- Prompt Repairs: Address any plumbing leaks, roof leaks, or structural issues promptly. Delaying repairs can lead to mould growth.
- Regular Cleaning: Perform regular cleaning and maintenance to prevent the buildup of dust and moisture in your home. Dust and clean surfaces, vacuum carpets, and keep drains clear.
By incorporating these preventive measures into your home maintenance routine, you can significantly reduce the risk of mould growth. Remember that mould prevention is an ongoing effort, and staying vigilant is key to maintaining a mould-free living space.
How to Stop Mould from Coming Back?
Preventing mould recurrence requires controlling moisture, improving ventilation, and regular cleaning. Combining preventive measures with safe cleaning habits keeps your walls, tiles, and corners mould-free. Here are a few key-steps to avoid mould coming back,
- Keep areas dry; fix leaks immediately.
- Ensure proper ventilation in bathrooms, kitchens, and basements.
- Use dehumidifiers in damp spaces.
- Clean regularly with natural or chemical mould removers.
- Avoid clutter that traps moisture.
- Use mould-resistant paints or coatings on walls.
How to Remove Black Mould?
Black mould can damage surfaces and affect health. Removing it requires proper cleaning, protective measures, and using effective natural or chemical remedies safely.
- Protect Yourself: Wear gloves, a mask, and goggles to avoid exposure to spores.
- Ventilate the Area: Open windows or use fans to improve airflow.
- Identify the Affected Area: Check walls, ceilings, tiles, and corners for visible black mould.
- Choose a Cleaner: Use chemical sprays, gels, or natural remedies like vinegar or hydrogen peroxide.
- Apply the Cleaner: Spray or apply the solution and let it sit for 10–15 minutes (or as instructed).
- Scrub the Surface: Use a brush or sponge to remove the mould thoroughly.
- Rinse and Dry: Wipe the area and ensure it’s completely dry to prevent regrowth.
- Dispose of Materials Safely: Throw away contaminated cloths or sponges carefully.
- Prevent Recurrence: Fix leaks, reduce humidity, and improve ventilation.
Tips to Keeping Surfaces Clean of Mould Longer
Maintaining a mould-free environment is not just about cleaning up existing mould; it's also about preventing its return. To achieve long-lasting cleanliness and prevent mould from making a comeback, here are some valuable tips and best practices to follow:
Importance of Consistent Cleanliness
Consistency is key when it comes to keeping mould at bay. Regular maintenance and cleanliness routines can significantly extend the time between mould occurrences. Here's why it matters:
- Health and Well-Being: Consistent cleanliness helps ensure the health and well-being of your family by minimising exposure to mould-related allergens and irritants.
- Property Protection: Regular cleaning and maintenance safeguard your property from mould-induced damage, saving you time and money on repairs.
Best Practices for Mould Prevention
- Humidity Control: One of the primary contributors to mould growth is high humidity. Invest in a hygrometer to monitor indoor humidity levels. Keep humidity below 50% by using dehumidifiers, air conditioners, or proper ventilation.
- Proper Ventilation: Ensure good airflow throughout your home, especially in moisture-prone areas like bathrooms and kitchens. Use exhaust fans, open windows, and consider installing ventilation systems if needed.
- Routine Cleaning of Prone Areas: Certain areas in your home are more susceptible to mould growth. These include bathrooms, basements, and crawl spaces. Develop a routine cleaning schedule for these areas to prevent mould from taking hold.
- Prompt Repairs: Address any water leaks, roof leaks, or plumbing issues immediately. Mould thrives in damp conditions, so swift repairs are essential to mould prevention.
- Use Mould-Resistant Materials: Consider using mould-resistant building materials, especially in areas prone to moisture. Mould-resistant drywall, paints, and insulation can be valuable investments.
- Regular Inspection: Periodically inspect your home for signs of moisture or mould. Look for discoloured patches, musty odors, or dampness. Early detection allows for prompt action.
- Dust and Vacuum Regularly: Dust and vacuum your home regularly to prevent the buildup of dust and debris. Mould spores can attach to dust particles, so reducing dust helps reduce the potential for mould.
- Seal Cracks and Gaps: Seal any cracks or gaps in your home's walls, windows, and doors to prevent moisture infiltration. Proper insulation and sealing keep moisture out.
- Consider Mould-Resistant Paints: In areas with a history of mould problems, using mould-resistant paints can provide an extra layer of protection against mould growth on walls and ceilings.
By implementing these best practices and making them a part of your home maintenance routine, you can enjoy a cleaner and mould-free living environment for longer periods. Remember, proactive prevention is often more effective and less time-consuming than dealing with mould once it takes hold.
How NoBroker Cleaning Services Can Help You Clean Mould?
When dealing with a mould infestation that seems daunting or if you're unsure about about how to clean mould then, turn to NoBroker Cleaning Services for expert assistance. Our professionals are mould removal specialists, equipped to ensure a mould-free living space for you and your family.
Benefits of choosing NoBroker Cleaning Services
- Expertise: Our team is well-trained in mould identification and eradication.
- Safe Solutions: We use industry-approved methods and safe cleaning agents for mould elimination.
- Comprehensive Service: We address both visible mould and its source to prevent recurrence.
- Customised Approach: Our services are tailored to your specific mould situation.
With NoBroker, you can have confidence in a mould-free and healthy home environment. Contact us today for effective mould cleaning and prevention.
Frequently Asked Questions
Frequently Asked Questions
1. What's the best mould remover for walls?
2. What kills black mould on wood?
3. How to remove fungus from wall effectively?
4. What is a fungus cleaner and why should I use it to clean mould?
5. What can I use to remove mould from painted walls?
6: What is the best way on how to clean mould from walls at home?
7: How can I get rid of black mould safely?
8: Are there professional mould cleaning services available?
9: How to remove mould off walls without damaging the paint?
10: What are the most effective mould removers for walls?
About the Author

priyanka.saha
Senior Editor
Hailing from Kolkata, Priyanka, a lover of literary classics, finds immense joy in exploring the nuances of language. With an unwavering love for reading stories and a profound passion for storytelling and wordplay, she effectively communicates relevant and practical information about the Indian realty market in a distinctive manner. Through her blogs, she skillfully immerses readers into the world of real estate, guiding them through every nook and cranny of the industry....
Recent Blogs
Subscribe to our Newsletter
Get latest news delivered straight to your inbox